Ikea library wall
I’ve always been an avid reader and I’ve always stored a lot of books. Each time I moved into a new place, most of my books begrudgingly stayed in the boxes they were packed in, because of limited space. I had one tall bookcase to showcase my favorites and my more often referenced non-fiction. I coveted the old English libraries, with the sliding ladder on wheels, or better yet, a second-story catwalk full of leatherbound adventures and discoveries. I’m a Stephen King fan and only have an 8-foot ceiling to work with, so my version of a library would never hold 18th-century works of art, a fireplace tall enough to stand in, or have the subtle hint of leather and cigar smoke, but it would be a library none-the-less!

“There is more treasure in books than in all the pirate’s loot on Treasure Island.”

thank you internet
I’m not sure who first created the built-in look with inexpensive Ikea Billy bookcases, but THANK YOU! Premade bookcases were several hundred dollars each (and I needed 4) and a custom built-in would run over $3K. When I started looking around Pinterest, I stumbled across this site and subsequently found many others, as well as various tutorials on Youtube. This is A THING! And we did it all for less than $400!!
We own a table saw, some power tools, and my husband knows basic electrical – so once I found the concept of what I wanted, we were off to the races!
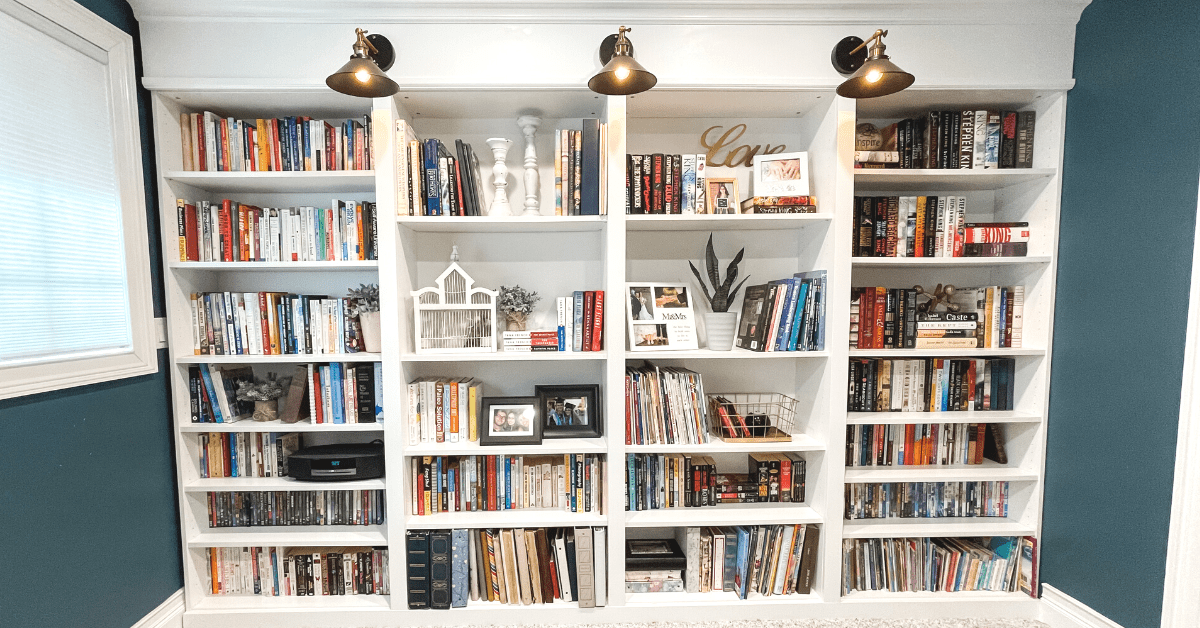
The Library is a 10-foot wall of bookcases. (think standard bedroom size) It’s also my office and so it needed to be muti-functional. I pulled in my overstuffed comfy-cozy reading chair (or as my husband refers to it “my ugly grandma chair”) added a desk, and finished the room off with pocket French doors. It’s perfect for me and I can escape to my own sanctuary any time I want.
The room itself was part of our whole house remodel and was the original kitchen location. We had electrical, gas, and water lines to deal with so we called in professionals to handle anything related to the building permit and inspections.
Know when to outsource!
")

What you’ll need
Ikea Billy bookcases or equivalent
Various trim pieces (preprimed to make our life easier)
Measuring tape, Nail gun, finish nails, power saw, paint brush, hammer, screwdriver, caulking gun, hole saw bit (if you're adding wired light fixtures)
Optional: Light fixtures of your choice and the electrical boxes and wire necessary for installation
Standard white paint and caulk
You'll need to modify the materials and cuts for your specific wall dimensions
")
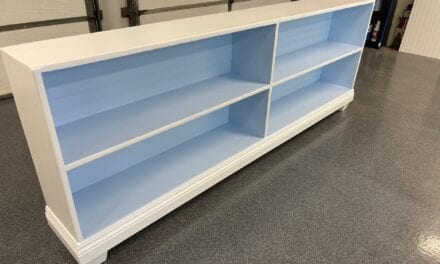
My husband did a lot of the work. (Ok, almost all of it. But I painted and was acting superintendent) Once the Ikea Billy bookcases* were put together and up against the wall, we needed to space them evenly using woodblocks.
*We opted for the 79 1/2″ tall units, in order to leave room for a soffit to hold the lights. It doesn’t touch the 8′ ceiling, but I really like the look, and if I ever want to add LED strip lights above the crown molding I can easily set that up. I also had visions of Christmas garland draping over the top. Basically, I left my options open!

The trim was purchased at Lowes, pre-primed, and came in various widths. It also needed to be substantial enough so it wouldn’t warp over time. We found exactly what we needed in the trim section of the store. So we only had to cut the lengths, paint, and install.
For the vertical trim, we used 2 1/2 inch wide pieces and the horizontal board housing the light fixtures was 10″. To cover the space under the 10″ board, we used another length of decorative 1 1/2″ trim piece and topped it with crown molding that is attached to the 2×4 framework running the length of all 4 bookcases.


There was some basic electrical work that needed to be done, and since this room was originally the kitchen we had plenty of outlets to work with. The light fixtures are hard-wired into a junction box we had the electricians install for us. The rest of the wiring my handy-dandy husband was able to do himself. To cut the perfect round opening for the electrical boxes, we used a hole-saw bit attached to the drill.
If you skip this step and don’t plan on including light fixtures, add your crown molding at this point to the top of the cabinets to finish off the built-in appearance.

")

Since this room was originally the kitchen, we had A LOT of electrical outlets to work around. The easiest thing for us to do was to just leave them in place, but they couldn’t be covered up for code reasons, so we had to cut the back of the cabinets to expose the outlets. This part of the project had its challenges and I apologize to anyone who has expert woodworking skills for the hack job we did. But it’s fine and unless you’re really looking for them, they go unnoticed.


the gap looking down
The trim piece we nailed along the bottom covered the base of the Ikea Billy bookcase and also became the platform for the horizontal trim pieces to sit on, but left a sizeable gap. We used a thin strip of wood to fill in the gap and caulked over it.
Easy-peasy!
")

")
")
Two things I would have done differently
- I centered the light fixture to align with the vertical trim – I only wanted 3 lights, but had 4 bookcases. I should have centered the middle one, and pushed the outer 2 to the center of the outer bookcases.
- I horizontally centered the lights in the 10″ large trim piece, but after adding the chair rail trim to the bottom and because the lamps hang down, I should have planned to place the light fixtures about 2 inches higher.
What I’m really happy with
- The overall project turned out better than I had hoped for! A full, crisp-white wall of bookcases, fancy crown molding, the built-in look without the crazy price tag, room for all my books, and space left for a few photos and such. (until I buy more books, of course)
- I really love the light fixtures! They were fairly inexpensive and the vintage black & copper go well with the feel of the room. I chose low-light (25 watt) bulbs for the perfect ambiance and it’s so cozy when I turn them on I can almost smell the leather and cigar smoke! 🙂
So now I have my finished library and a room to myself. I added a desk and I work here, I meditate here, I read here, and create my blogs while looking out the window. I chose a dark teal blue (SW Bunglehouse Blue, eggshell) for the walls of the room, and added pink & gold accents. The white bookcases and white trim against the dark blue looks amazing! I make my coffee in the morning, sit in my comfy-cozy overstuffed chair, and can pull any book off the shelf and read. Or I can sit at my desk and work. Or I can do nothing and breathe. It’s a perfect place to just BE!
")
4 Comments
Leave a Reply to Janet Danelia Cancel reply
This post may contain affiliate links. Danelia Design is a participant in the Amazon Services LLC Associates Program, an affiliate advertising program designed to provide a means for sites to earn advertising fees by advertising and linking to amazon.com. For more information, please read my disclaimer here.


Hello Janet! I am interested in doing this in my bedroom on the wall where my TV is. What are your thoughts on putting TV dead center of it in it all? And if you would, how would you go about it?
That would look really nice! It just takes a bit of planning upfront. You’ll want to measure your TV carefully and design the cabinet layout around it so everything feels balanced and intentional. IKEA does offer a shorter Billy bookcase that can work well underneath the TV, which helps anchor the whole setup. Definitely doable—and it could turn out really great!
Hey Janet,
Love this idea, not ready to do it, can I circle back to this somehow when I get ready to do it?
Great question Rod! You can pin this to Pinterest or save it to FB, the drop-down menu for DIY Project will always be there, or alternatively, you can use the search bar to find it again. I hope you create something amazing and I’d love to see it if you do!