Sauerkraut at home
Making sauerkraut at home in nothing like the storebought version. The crunchy sour-salty probiotic can be switched up by adding different vegetables and spices to give you almost limitless flavor combinations. And please, never ever buy it from a can.
Servings
30 (1) oz servings
Prep time:
15-20 minutes
Fermentation:
3 to 10 days
Calories:
10
About this Recipe
My mom loved sauerkraut, and as a kid I hated it. She would serve it warm with bratwurst and…um…just…no. I also used to hate sour cream and bleu cheese. But as I grew, my palette matured and now all 3 are staples in my kitchen. I make fresh sauerkraut regularly, and when the jar is getting low, that tips me to start another batch. It only takes 15 minutes, so it’s a simple and easy side to always have in the fridge.

Ingredients
- 1 head organic green cabbage (organic seems to ferment better)
- 1.5 to 2 tbsp sea salt (or any non-iodized salt)
- OPTIONAL:
- 1/4 cup grated carrot, beet, red cabbage, or any other root vegetable
- 2 garlic cloves, minced
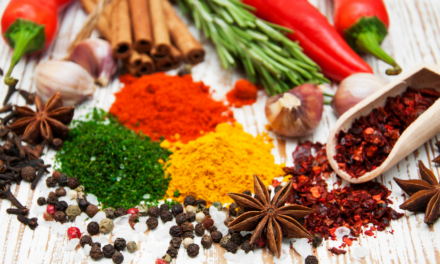
- 1 tsp caraway seeds, dill, juniper berries, fennel, or celery seeds
Equipment
- Kitchen Scale
- Measuring spoons
- Large mixing bowl
- Muddler or wooden spoon
- Clean and sterile mason jar or fermentation crock
- Fermentation lid
- Sharp knife and cutting board
Before you rush out and purchase anything you don’t already own, there are alternate ways to make sauerkraut that use what you probably already have on hand. Simple and easy!
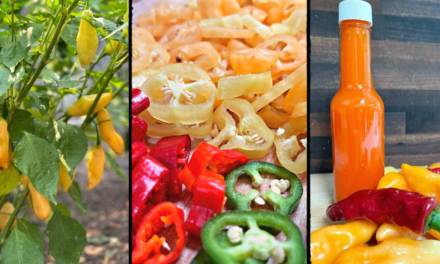
I make my sauerkraut using green or purple cabbage. If you go with the purple make sure to wear food handling gloves and an apron or you will walk around looking like you murdered Barney the Dinosaur. I choose organic cabbage because I’ve found if I don’t, the naturally occurring fermentation takes longer and it just doesn’t seem to have that tangy tartness that makes it so good. So organic it is!
Experiment by adding other shredded or julienned vegetables like carrots, radish, celery root, or even a Granny Smith apple to your cabbage. Try adding various spices and you can create endless variations to complement any meal.
My go-to is just the down and dirty, basic recipe. I can eat it straight from the jar at any time. And since my husband isn’t a big fan, (no accounting for taste) it’s all mine!!
I want to note that the large red plastic mixing bowl I use was purchased at the Dollar Store. I own really nice glass bowls, expensive Tupperware bows, and a HUGE, beautiful, cherrywood bowl…but most of the time I come back to this red one. I bought three of them. Two of which always go camping with us. Because it’s giant, super light, easy to clean, and if it gets ruined I’m not out any real money. So far it’s lasted close to ten years. (no joke!) And last I checked, the Dollar store still carries them. It’s pretty indestructible and for a buck, really??? How can you go wrong? So I save my fancy bowls for when other people may see what I’m doing. But this is my little secret. Or at least it was. Anyway, back to the recipe…
")
")
Step by Step Instructions
Step 1
Core cabbage and set core aside. Remove outer, wilted leaves. Cut into quarters. Roughly chop or shred each section. Weigh your cabbage and add salt accordingly:
Use 1 1/2 teaspoons of salt per pound of cabbage. By weight, it’s 2 grams of salt for every 100 grams of cabbage & any added vegetables, such as carrots. This exact weighted measurement gives you the perfect sauerkraut every time!
Step 2
Start working the salt into the cabbage Push down the cabbage with muddler to incorporate the salt. Or go straight at it with your hands and massaging and squeezing the cabbage. The salt will start to draw out the liquid and change the texture from crisp to limp. Spend about 5 minutes doing this. I use the muddler to get started and finish it with my hands. At this point add any additional herbs or spices.
Step 3
Pack the cabbage into your jar. The muddler comes in handy again for this step. You’ll want to compact it as tightly as possible. The liquid should rise to the top coving the cabbage completely. Leave a half-inch of space at the top, so nothing is touching the lid.
Step 4
To avoid any oxygen getting to the cabbage, you can weigh it down with the cabbage core that you set aside. Alternatively, you can purchase a fermentation lid. The idea is to not let oxygen get to the sauerkraut, but the carbon dioxide needs to be released. A fermentation lid or coffee filter secured with a rubber band will do this on its own. Otherwise, unscrew the lid each day for the first few days to release any gas. Make sure your sauerkraut is still submerged in the brine.

Step 5
Keep the jar in a cool dry place, checking daily to “burp” the lid if needed. Using a plate or bowl under the jar will catch any overflow. After 3 days the sauerkraut is technically done, but for better kraut you can let it ferment longer. After 10 days (or up to 30) tighten the lid and refrigerate. Fermented sauerkraut will last several months in the fridge.


The finished product will have changed color slightly and more liquid will have risen to the top. Give it a good stir to incorporate. If there is any white, green, or gray scum on the top, simply spoon it out – there is nothing wrong with your sauerkraut. However if the mold is black, orange, or pink or if your sauerkraut has a slimy texture or bad smell, then toss it and start over.

")


")
Health Benefits
Fermented foods like sauerkraut are an excellent source of probiotics, helping to grow the good gut flora. Why does that matter? Having the right conditions in your gut helps your body to absorb vitamins and minerals. Probiotics can also help reduce gas, bloating, & constipation. Sauerkraut is a high fiber food, full of vitamin C, K1, Iron, and B6, among others. Basically, it’s a superfood and should be part of your regular diet.
Plus you can put it on a hot dog, so there’s a good reason to eat a hot dog!*
*I realize that I just put a healthy spin on eating hot dogs, but at least I didn’t mention adding the accompanying ice-cold beer!
ENJOY!
")
This post may contain affiliate links. Danelia Design is a participant in the Amazon Services LLC Associates Program, an affiliate advertising program designed to provide a means for sites to earn advertising fees by advertising and linking to amazon.com. For more information, please read my disclaimer here.

