How to make low lying (Ground) Fog for Halloween
My husband and I bought a low-lying fog machine and low-lying fog juice to go with it. At a premium. More expensive must be better, right? But what we found was that the only difference from this fog machine from another one half the cost was the compartment for ice. Fog that is colder than the temperature around it will stay lower to the ground and produce that awesome creepy graveyard fog seeping in between the crumbling, decaying moss-covered headstones. Regular fog machines will disperse the fog in a more upward direction and fill the room. We wanted creepy.
The concept behind the ice is spot on. In application, however, it falls short. The ice compartment is next to the extremely hot motor, melting the ice in less than 10 minutes. So filling the ice that often is not something I’m interested in. Ain’t no one got time for that!
There are about as many ways to create low-lying fog as there are ways to carve a pumpkin. None of them are wrong, and they’re all unique. So after more internet research than I care to admit, I bring you:
THE LOW-LYING FOG ICE BOX!

What you’ll need
- A fog machine. They can be found anywhere from $30-$100. You can spend more and you’ll get a larger output of fog – but unless you’re a DJ or making your own low-budget slasher film, you might as well save yourself the money.
- Low lying fog juice. This has a higher percentage of vegetable glycerin and produces a thicker fog. Regular fog juice will also work, but the thicker choice is better for the final result. You also have the option of making your own, which is less expensive and will give you the flexibility to control how thick your fog will be. Click here for an easy DIY fog juice tutorial.
- A container with a lid. An ice chest – (plastic or styrofoam), a plastic storage tub, a plastic garbage can, or a bucket with a lid. The idea is to chill the fog juice as it comes out of the fog machine, so you need a place to hold the ice.
- 20 feet of 4-inch flexible dryer ducting. The length may vary depending on the size of your container.
- 4″ hole saw & drill (or a sharp utility knife) to cut through the plastic. If you’re using an ice chest, you’ll have to use a hole saw.
- Duct tape, glue gun and glue, and 4 small strong magnets.
- Optional: black spray paint
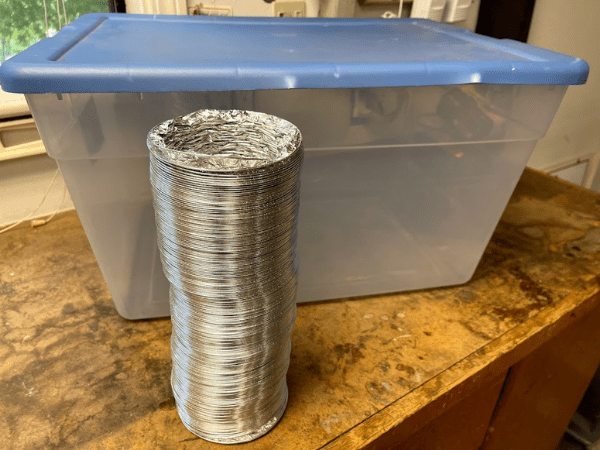
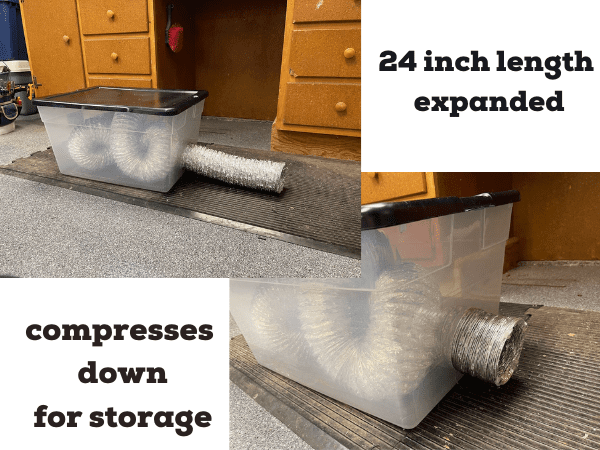
Storage tub with lid and 4 inch flexible dryer duct ready to go!
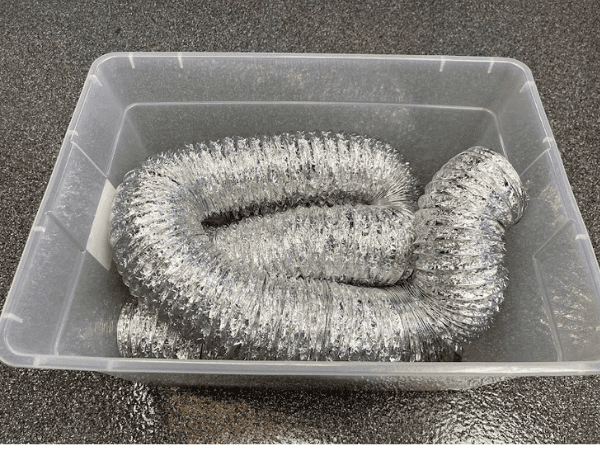
Expand and dry-fit the ducting.
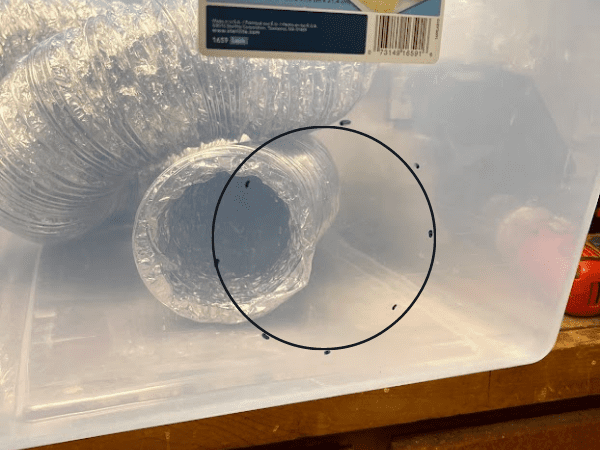
Mark the location of your 4-inch cut-out. Centered from the sides and about 2 inches from the bottom.

You can purchase a drill kit with varying sizes of hole saws, or one 4 inch hole saw as a standalone. The kit will only work for shallow depth cutting. You may need a more substantial hole saw if you’re using an ice chest for this project. Either way, use a hole saw with a guide drill bit to keep the saw hole stable and in place.

Cut your hole and repeat the process on the opposite side of your container. One for the input and one on the exit side.
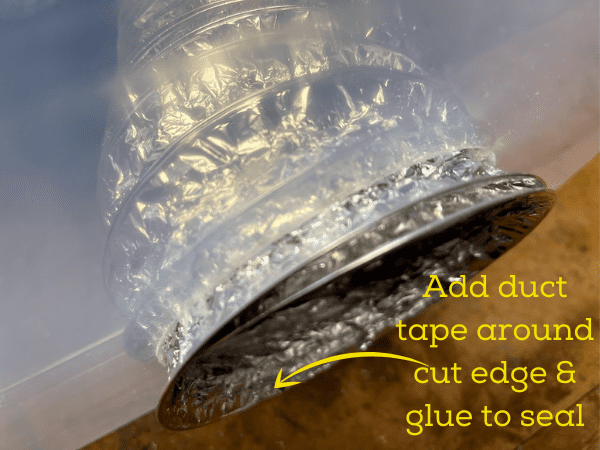
On the exit side, you’ll want to gently pull out an inch section of duct and duct tape any wire or cut area. Using a glue gun, seal the edge between the outside of the duct and the cut edge of the hole. This will prevent any water from leaking out as the ice melts.
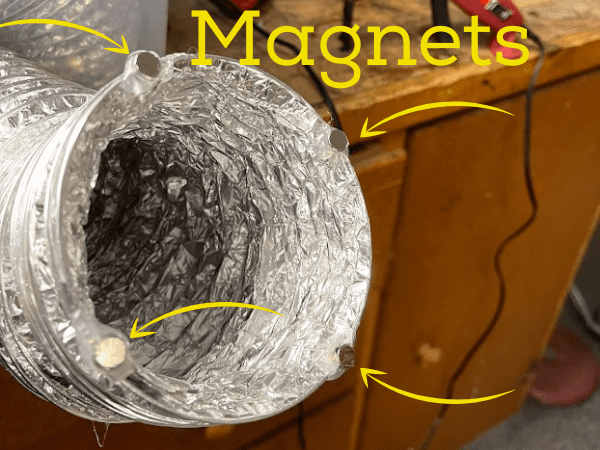
Glue gun 4 small disk magnets to the edge of the duct.
You’ll be able to easily attach the magnets to the metal output of the fog machine. (see additional instructions below)

Time to put it all together!
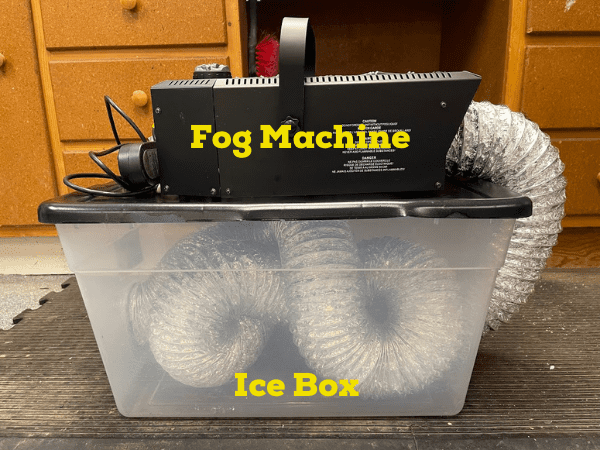
Gently pull about 2 feet of the duct through the opposite side opening. This will attach to the output of your fog machine. Seal the outside edge of the box hole with your glue gun to prevent leaks.
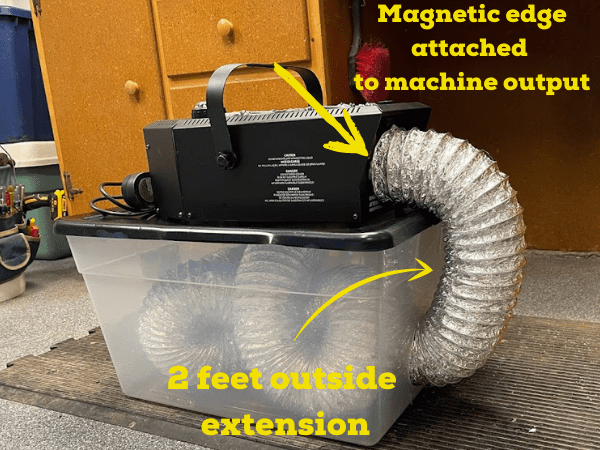
The 2 foot extension will now reach the output of the fog machine. I did this to keep a compact footprint. You could also keep the machine on the ground next to the box. No wrong way here. The magnets attached in the previous step allow for easy off and on, but do not make a perfect seal. Some fog will escape. You could wrap a towel or piece of fabric around the duct to help prevent any leakage.
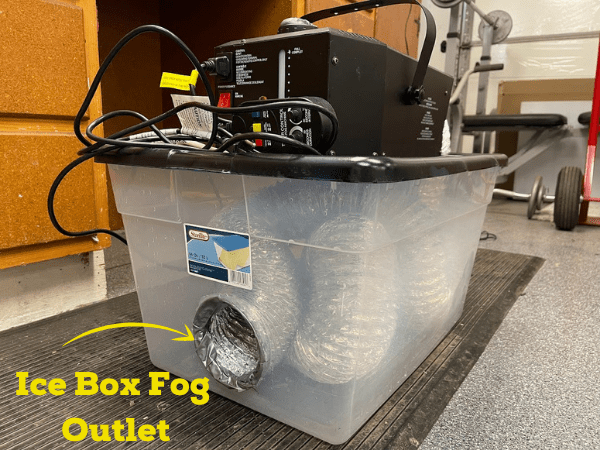
The fog will pour out the outlet side of the ice box, creating the low lying effect of creeping ground fog. For more flexibility in the fog output, adding another section of duct would allow you to discreetly hide the box and control the exit location of the fog from any distance you choose.
The Final Product
I spray-painted the lid black and chose a dark green creepy cloth to cover the box and hide it in the bushes. You could also spray paint the entire box, but this way I can easily see how much ice is left. Don’t cover the fog machine itself. It gets really hot and needs ventilation.
Fill the box with ice, fill the machine with fog juice, place it in the best location for a full-on creepy factor and you’re ready to impress the neighbors!
I mixed my own solution* using 1/3 cup 100% pure vegetable glycerin and 2/3 cup distilled water. (click here to learn more)
The conditions were perfect for this demonstration. I took the fogger into the backyard lawn. There wasn’t any wind and it was a warm temperature of 70 degrees. You always want your fog colder than the outside temperature. Hence, all the ice! And the results could not have been more perfect!
* Using your own fog juice may void the warranty of your fog machine, but is less expensive and you have the flexibility to change the density of the fog.
")
")
This post may contain affiliate links. Danelia Design is a participant in the Amazon Services LLC Associates Program, an affiliate advertising program designed to provide a means for sites to earn advertising fees by advertising and linking to amazon.com. For more information, please read my disclaimer here.


I love this idea for creating a spooky atmosphere! The step-by-step instructions are super helpful, and I can’t wait to try this for my Halloween decorations. Thanks for sharing such a creative and fun project!
Love the look of the fog, well done
Thank you! I lucked out with the warmer weather to help keep the fog low for longer than I had expected.
This is such a fun and creative tutorial! I can’t wait to try making low-lying fog for my Halloween party this year. Your step-by-step instructions are really clear, and the tips about using it in different spaces are super helpful. Thanks for sharing!
Hiii!! FANTASTIC IDEA!!
Regular ice or dry ice??
Thank you! 🙂
I used regular ice. (Block ice will last longer) Dry ice can damage plastic – making it brittle and prone to breaking. Good luck!
This is such a creative idea! I love the spooky atmosphere that low lying fog adds to Halloween decorations. Can’t wait to try this out for my haunted house this year! Thanks for sharing the detailed instructions!
Hi Janet,
What was the make & model of the fog machine you used?
Thank you for the great idea!
-Damon
Hi Damon,
I purchased the fog machine at Spirit Halloween a few years back. http://www.spirithalloween.com/product/400-watt-low-lying-fog-machine/174713.uts -It’s a low lying fog machine on it’s own, but because the ice compartment is next to the hot motor, the ice would melt quickly. Making my own ice box, I only had to fill the tub one time and it lasted about 6 hours. Any fog machine should work for this project. I hope yours is fantastic!