How to German Schmear
Yes, it can be done in a single weekend! & For less than $200! Items you'll needChip & Joanna were my inspiration (again)
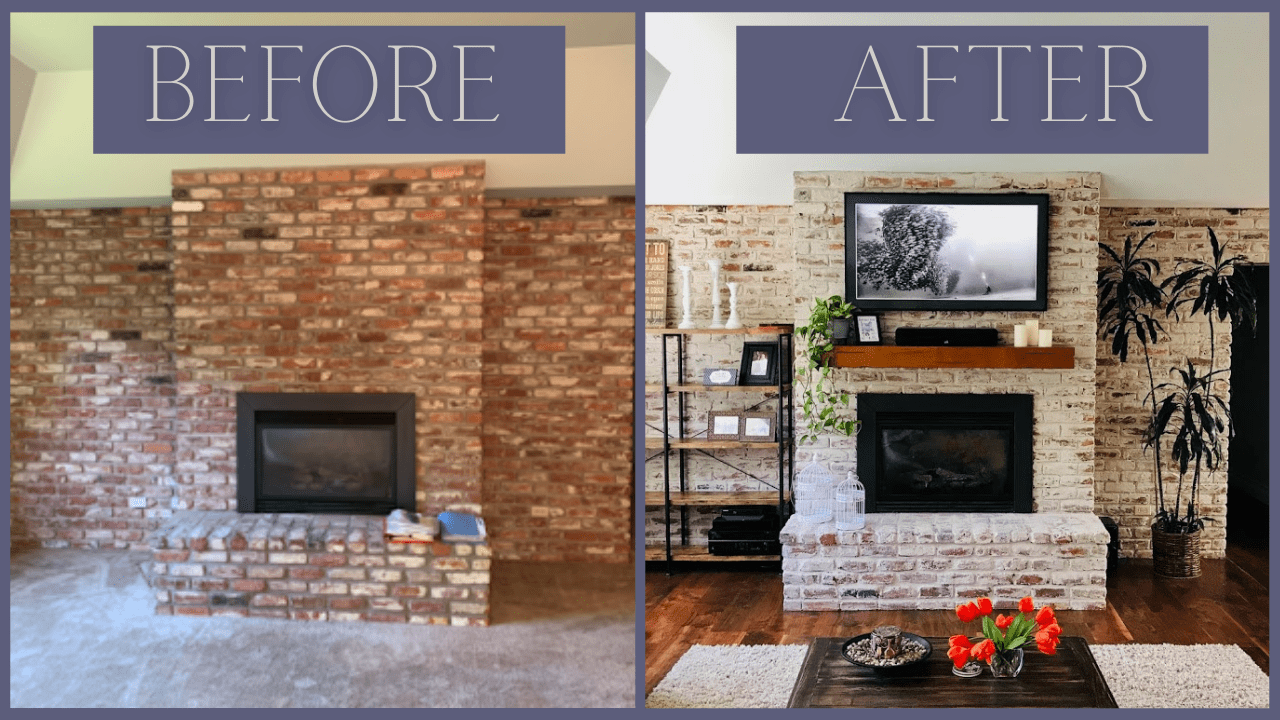
Fixer Upper has given us so many reasons to tear down walls and fall in love with shiplap, but one of the more interesting projects was to cover an old brick fireplace with mortar in what is called “German Schmear”.
Google will give you tons of websites and Youtube videos for the process, and everyone seems to do it just a little differently.
I searched until I found the end product that I liked the best and then tried to replicate it. Yes, I watched a dozen videos and incorporated parts and pieces from everything I saw to take on the task!
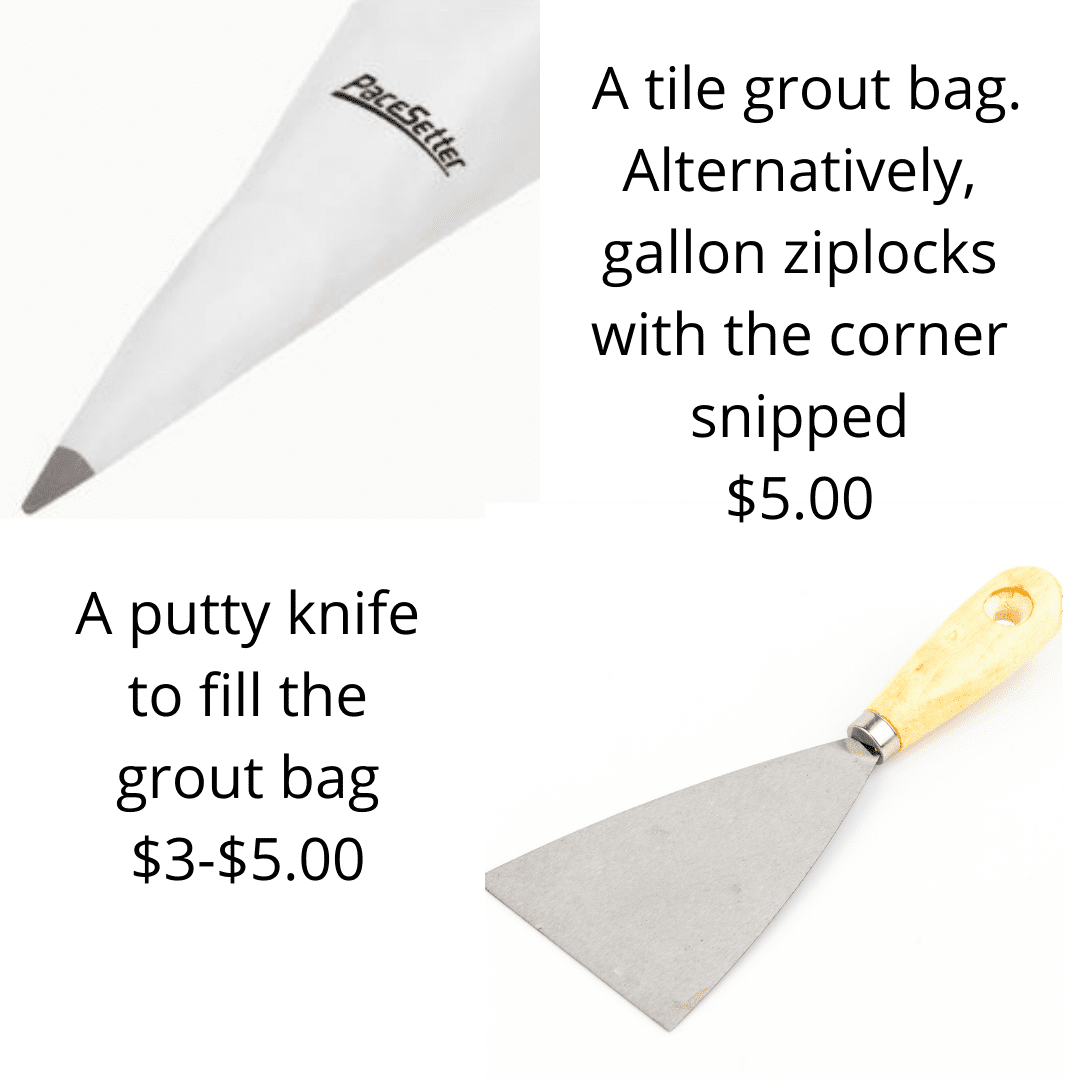
Items you’ll need
Everything can be purchased at any hardware store or from Amazon
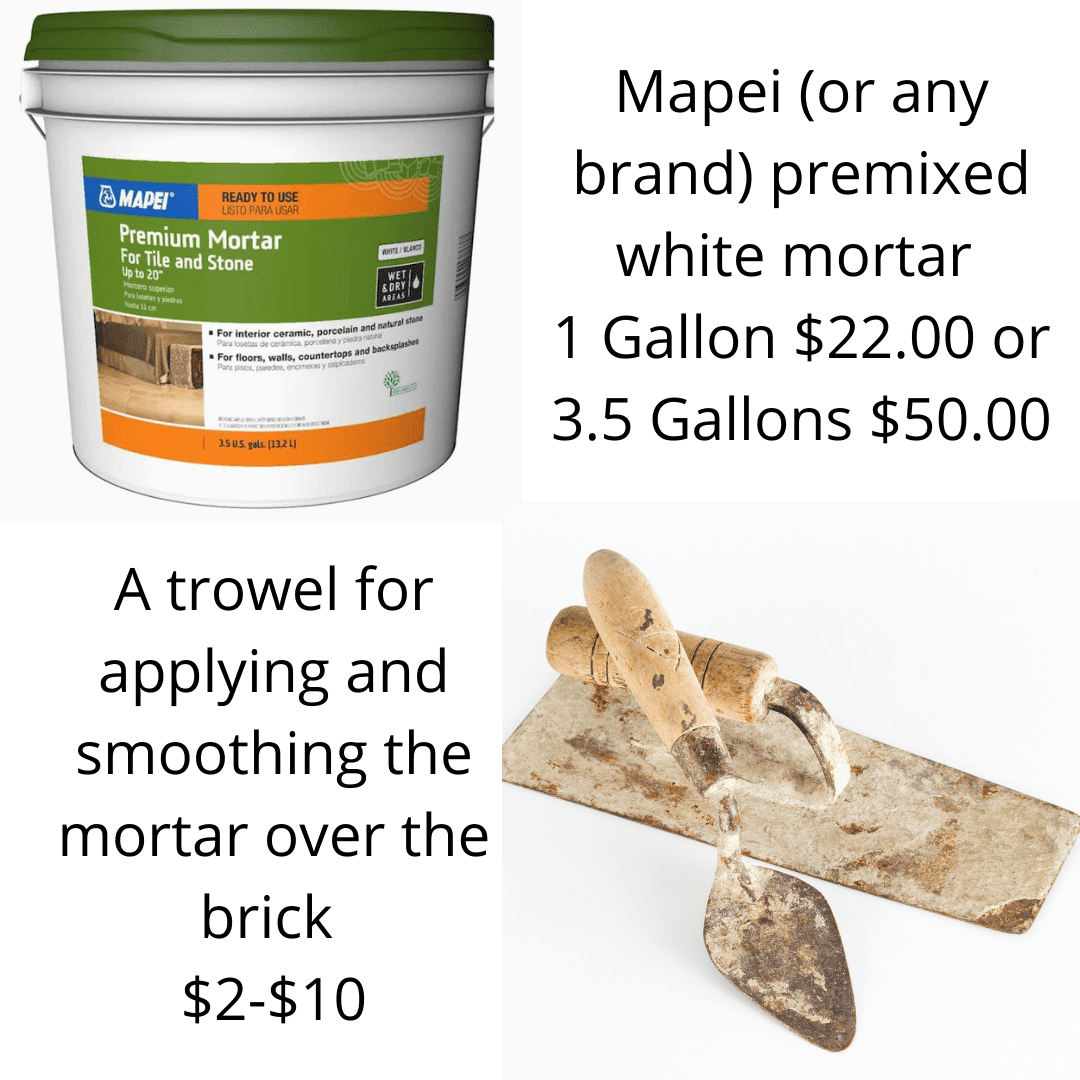



The decision to German Schmear the brick wall and fireplace hearth was an easy one for me. I also knew that this is a permanent project and you can’t go back! I loved all the images I saw online and figured if I watched enough Youtube videos, I couldn’t mess it up too badly. I wanted a light coat, so the color of some of the brick would show through various spots. What I didn’t expect was how deep the existing joints between the brick were and how much mortar I would go through. Filling in the joints took the majority of the product and the majority of the labor. Aside from that, getting the right technique to achieve the results I was hoping for happened fairly quickly. Not all brickwork will have similar joint depth. The more flush it is, the less mortar you’ll need.
I finished the project in 2 days, with a little touch up a few days later for the spots I missed or where I wanted to add more texture. I went through two 3.5 -gallon tubs and another single gallon to finish the hearth. I was covering a lot of space with deeply grooved joints. I had an entire wall 22 feet long by 8′ high, plus the bump-out for the fireplace. That’s a lot of wall! It would have been less expensive to buy a powdered mortar and mix it myself, but I skipped the messiness and went for premixed.
PREP YOUR BRICK
Getting the brick ready was pretty simple. Using blue painter’s tape, I taped around the edges of the fireplace surround, the ceiling (you’ll need a step ladder), the adjacent walls, and tarped the floor. The mortar will get EVERYWHERE, so wear clothes you may not care about too much. And protecting the surrounding area is a must! Next, I used a stiff brush and a broom to sweep any dust off the wall and hearth. I pulled out all my materials and put on heavy rubber gloves. This stuff is messy, so I tried to plan ahead for an easier clean-up.
Wet your wall
I started with a regular household sprayer, but it just didn’t do the job, so I moved to a basic yard sprayer to really get the brick wet. Not sopping wet, but definitely more than a light spray. You’ll notice a difference when you add the mortar to the bricks. The mortar will adhere and form a better bond when your surface is wet. Using a premixed mortar, I added it to the gallon ziplock bag and cut the corner, and piped in the mortar to the joints, just like you’d use a frosting bag. I didn’t reuse the bags, they were too messy and sticky – so I went through A LOT of zip locks.
And…Schmear!
Working across in small sections, once the mortar was in the grooves, I used both the trowel and my hands to wipe the mortar onto the brick faces. The trowel alone needed too much mortar to work correctly, so I mostly used a light swipe of my hands, and then ran the trowel over with enough pressure to achieve the look I wanted. I skipped some bricks, so they would show through and went heavy in other areas. For several hours I just wet, piped, schmeared, and troweled. Oh, and I stepped back after each section of the application to check out my handiwork.
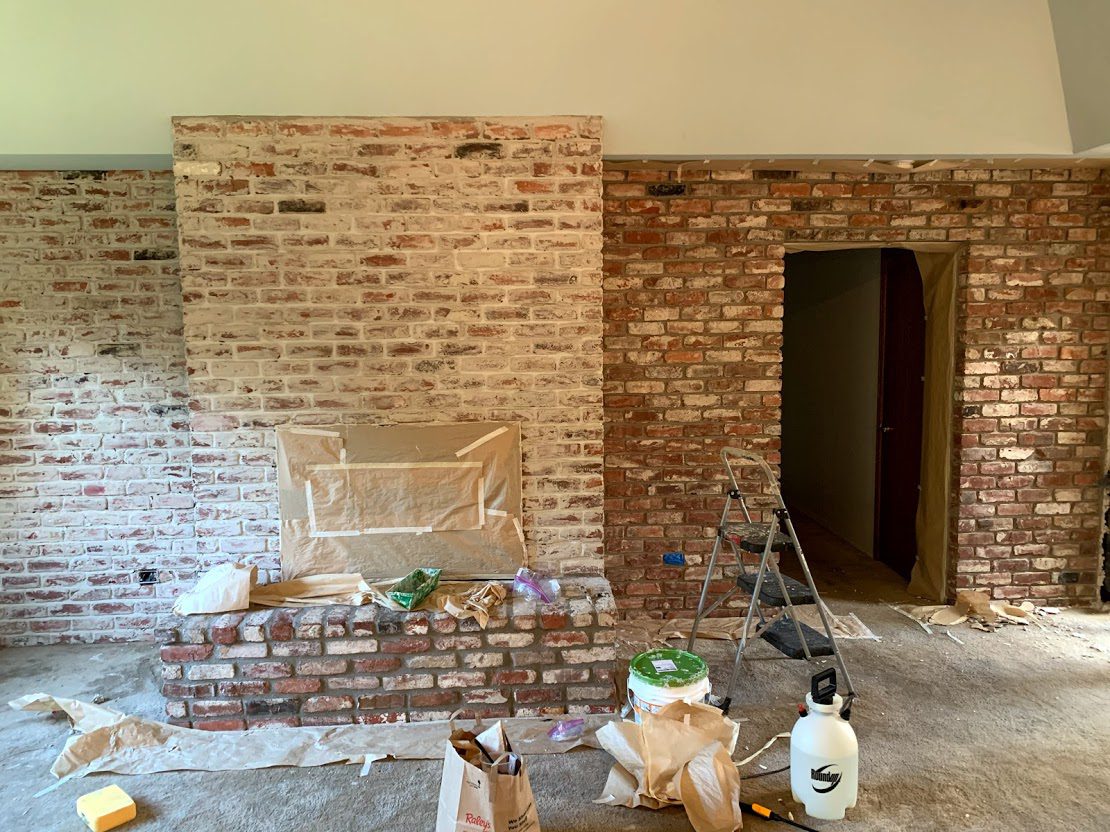
This picture was taken after my first day, I had already taken off some of the taped areas, and was starting to prep the last section of the wall. I knew we were tearing out the carpet, so I was probably messier than I could’ve been otherwise.

The original fireplace had been replaced with a gas insert by the previous owners, which is wonderful! But I really felt like it was missing a mantel. I mean, really…where else do you hang your stockings? 🙂 I ordered a mantel from Wayfair. Well, I ordered one, didn’t like the color and sent it back. Then I ordered one in another finish and it was perfect! The mantel itself is hollow, so the installation was easy and I did it in a couple of hours. The instructions came with the mantel and there were Youtube videos, as well.

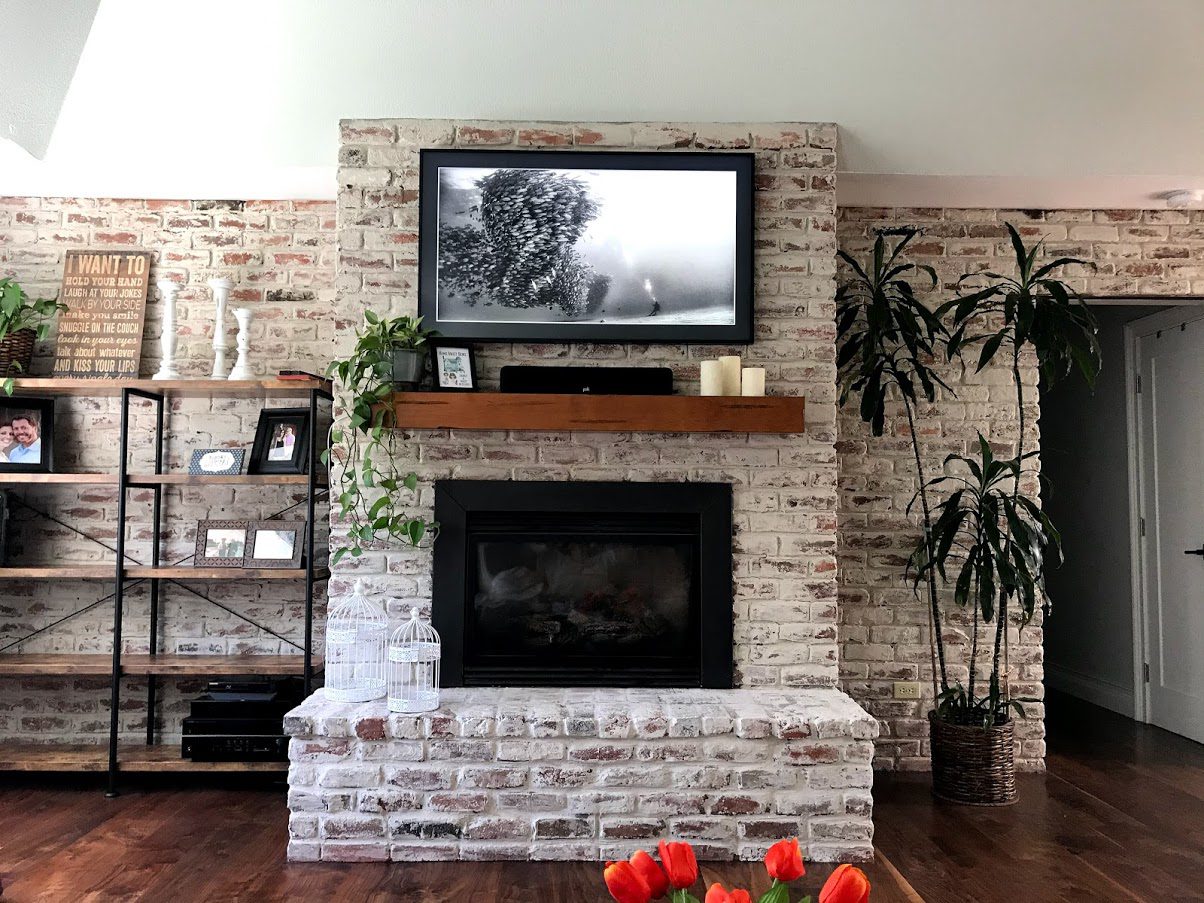
Time to relax!
Once we moved in, unpacked, and organized, there was time to relax and enjoy our handiwork. Growing up in wine country, I can’t think of a better way to end the night than by a cozy fire with an amazing glass of Zinfandel. We still have more projects to go, and we may never finish (because Pinterest makes me want to do EVERYTHING), but for now, I think we’ve earned a little R&R. Cheers!
Freshen Up For Spring With A Bright & Cheerful Home
Refresh your home with spring decor, spring cleaning, and a bright new season to cheer you up after a long winter of hibernation.
Casual Home Design
Soft and comfortable. Natural and relaxed. Lived in and refined. Modest and chic. The Casual Home Design is a comforting warm embrace to come home to each day and one that we just can’t get enough of.
2-Minute Crafts – DIY Fall Door Wreath
Make this gorgeous fall wreath in 2 minutes flat!
DIY this stunning autumn door wreath with only a few items and a couple of minutes! No glue, no cutting, & no artistic ability necessary!!
This post may contain affiliate links. Danelia Design is a participant in the Amazon Services LLC Associates Program, an affiliate advertising program designed to provide a means for sites to earn advertising fees by advertising and linking to amazon.com. For more information, please read my disclaimer here.


