Easy Home made Fermented Kosher Dill Pickles
Here’s a quick and easy recipe for fresh, crisp, garlicky, spicy, probiotic-filled Kosher dill pickles that you’ll crave over all others!
Prep Time
30 minutes
Ready In:
3-5 Days
Will Keep
2 Months
Makes
2 Quart Jars
About this Recipe
These are incredible refrigerator pickles with a whole lotta yumminess to them. Oh, and they’re good for you, too! With minimal prep work, Mother Nature takes over and Lacto-Ferments simple cucumbers and turns them into a salty, tart, effervescent treat! And they’re full of probiotics.
Probiotic is more than a trendy word thrown around in health circles. These little guys help maintain gut health, which in turn keeps so much of your body functioning correctly. A big statement for just a jar of pickles…but really it’s true!
")

Kitchen Accessories
- (2) quart-sized mason jars & lids (washed & sterile)
- small pot for boiling water
- kitchen scale
- measuring cup & tablespoon
- sharp knife
- cutting board
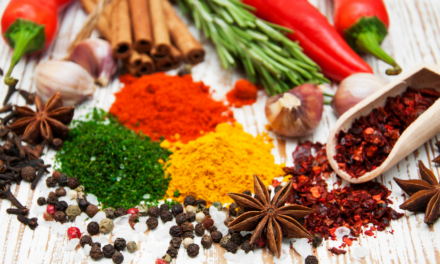
Ingredients
")
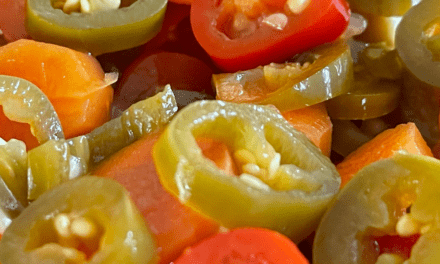
- 8-9 pickling cucumbers (organic, if possible)
- 4 cups chlorine-free water
- 30 grams (or 2 tablespoons) Kosher or Sea Salt (not table salt)
- 1 bunch fresh dill weed (stems, flowers, & seeds can be used)
- 8-10 garlic cloves
- 2 Tbsp peppercorns
- 2 Tbsp mustard seeds
- 6 dried bay leaves or fresh grape leaves
Optional:
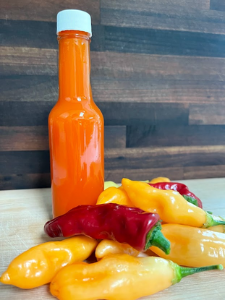
- 4 serrano, jalapeno peppers, or dried chilies
- White onions
- Carrots
- The water is key to this recipe. Any chlorine in the water will prevent the Lacto-Fermentation from occurring. This is what will preserve your pickles, so it’s critical to the recipe. You can boil the water for 15 minutes to remove the chlorine. You can let it sit out for 24 hours (but it could take up to 5 days for the chlorine to evaporate) Dechlorinate your water or use filtered, distilled, or spring water.
- The second most important aspect to get correct is the water to salt-ratio. You have a small room for error with adding more if you like saltier pickles. Using too less will prevent the recipe from doing its magic. Weighing the salt will give you exactly what you want, but if you don’t own a scale, don’t worry, it’ll work just fine by spoon measurement.
- When measuring, if you’re not using a scale, make sure the salt is fine grain for your measuring spoon.
- Choose the correct salt. It can be almost any kind, except your standard table salt. Table salt contains iodine and it’s been processed which removes any natural minerals.
- Salt Options: Himalayan Pink, Gray, Pickling, Sea, or Kosher
- The bay or grape leaves contain tannins that will help to keep your cucumbers crisp. You can skip this step and it won’t change the flavor, but your pickles may be a bit softer.
Step by Step Instructions
Step 1
Prepare your jars ahead of time. Clean & sterilize them. Do this by either running them through the dishwasher, or wash with hot water and dish soap, rinsing them well, and then letting them sit in boiling water for 10 minutes. Let the jars cool before adding any ingredients.
Step 2
Prepare your brine. Add 4 cups of filtered, distilled, or spring water to a small pot and bring to just a boil. Turn off the heat. Add the salt and stir until dissolved. Set aside and let cool.
Step 3
Clean your cucumbers in cold water and remove any blossom ends or debris. They can sit in the refrigerator for a few days if you’re not ready to can them yet. You want them cold, so either put them in a bowl of ice water or pull them from the refrigerator just before you’re ready to finish the recipe.
Step 4
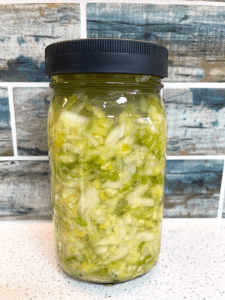
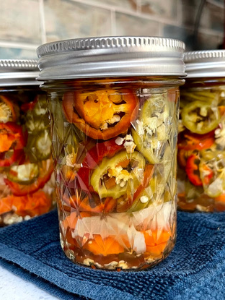
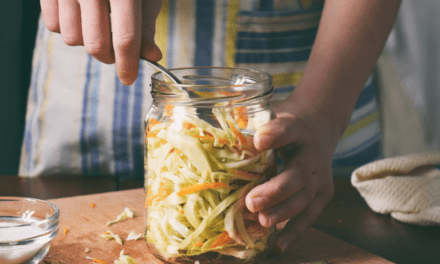
Divide all your ingredients equally between the two mason jars. It’s your choice to slice your cucumbers lengthwise or leave them whole. The size of the cucumber may dictate how many fit in your jar. Adding the cucumbers first will allow you to squeeze in the remaining ingredients afterward to ensure a tight fit.
→ Pro Tip: Slicing a bit off the blossom end can help your cucumber to stay more crisp
Step 5
Pour the cooled brine into the jars, leaving about a 1/4 inch gap at the top. You can opt to use a cheesecloth and rubber band over the top until they are ready for the refrigerator. You can use the standard lid. And of course, you can use a fermentation lid. The idea is to not let air in, and release the built-up carbon dioxide. If you use a standard screw top lid, you’ll need to “burp” the lid each day. If the carbon dioxide builds up, you may have a huge mess on your hands!
IMPORTANT: Your cucs need to be fully submersed under the brine. Use a fermentation weight, or a small ziploc or smaller jar filled with water. If exposed to air, your cucumbers will develop a white film (bacteria growth) and cause spoilage, ruining all your hard work.
Step 6
Store in a dark, cool place for 3-5 days. “Burping” the lid (unscrewing it slightly until the pressure releases) each day. You may see bubbles and that’s the process working. The brine will get cloudy, this is normal. Letting them sit for the full 5 days will give you a more “sour” taste. If you want more of a salty flavor with less tingle on the tongue, 3 days is perfect.
Pro Tip: Place a plate or container under your jars, to make any spillage easier to clean up.
To Store:
Once you’ve tasted and decided they’re the best version of themselves, add a screw top lid, tighten, and place in the refrigerator. They will last for up to 2 months or longer. They should be garlicky, salty, sour, and tingle a bit on your tongue.
Always use good judgment and don’t eat any food that tastes “off”.
")
")
")
")
")
")
Note that this recipe is only using a saltwater brine and NO vinegar. Salt and water are all you need to ferment cucumbers. The addition of garlic is what makes this recipe “Kosher” style. The other herbs and seasonings are what make this THE BEST Kosher-style pickle on the planet! I know, I know, your grandmother used to make incredible pickles. But I’m telling you that if you follow this recipe (adding hot peppers or chilies really take it up a notch) you’ll be crowned the new Pickle Princess! And all you’re friends and family will be begging you for a jar!
The Preserved Cuke
Preserving cucumbers has been around for over 4,000 years! This Lacto-Fermentation process, when followed, is perfectly safe and will produce some of the best pickles you’ve ever had! They’re preserved not only to extend the life of your vegetable, but for the health benefits, as well.
- Lacto Fermentation promotes good bacterial (probiotics) for a healthy gut
- The brine helps with muscle cramping
- Cucumbers are full of Vitamin B, to help keep stress at bay
- Fiber-rich and good for weight management
- May fight inflammation
- Cucumbers contain fisetin (an anti-inflammatory substance) which has been shown to protect nerve cells against aging and help with memory.
")
")
This post may contain affiliate links. Danelia Design is a participant in the Amazon Services LLC Associates Program, an affiliate advertising program designed to provide a means for sites to earn advertising fees by advertising and linking to amazon.com. For more information, please read my disclaimer here.


0 Comments