Spooky Halloween Front Door Decorations
Here are some ideas to design a spooky front entrance for all the neighborhood Candy Collecting Trick o’ Treaters. Also, for the delivery drivers throughout the month to enjoy!

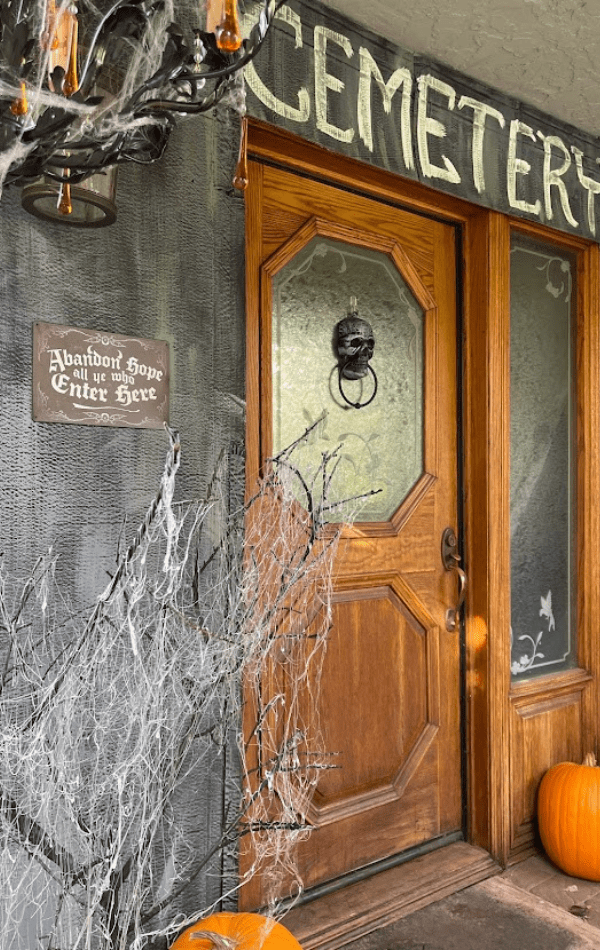
Take your average everyday boring front entrance and create a Haunted Facade that would impress Dracula himself.
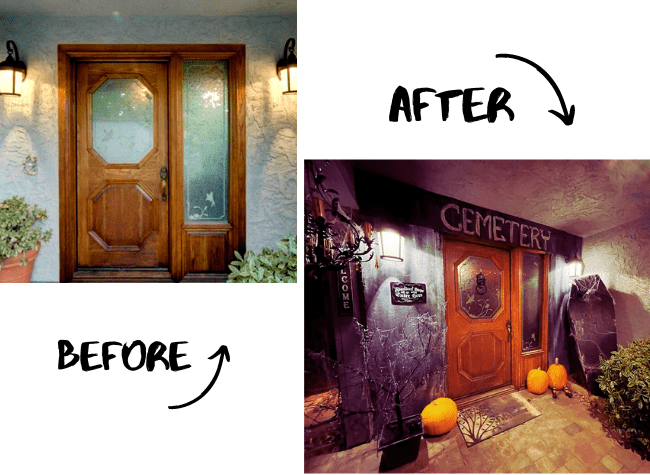
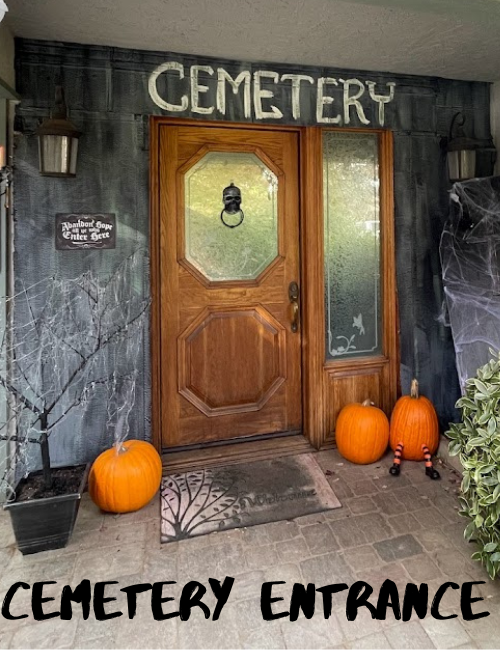
The backdrop for the spooky scene starts with a cardboard Cemetery sign that is reminiscent of a mausoleum entrance. Inexpensive to make and takes almost no artistic skill. (meaning it’s really hard to mess up!)
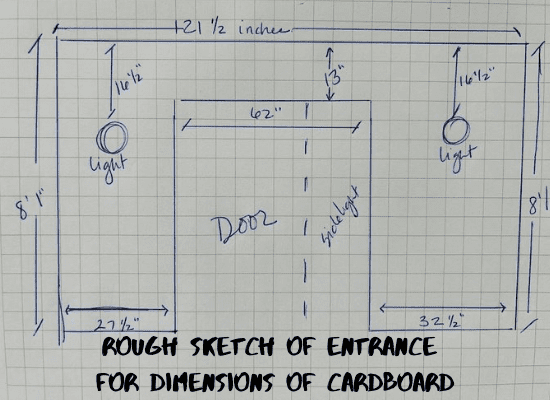
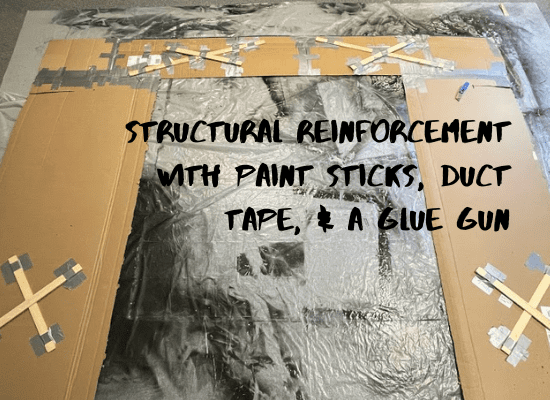
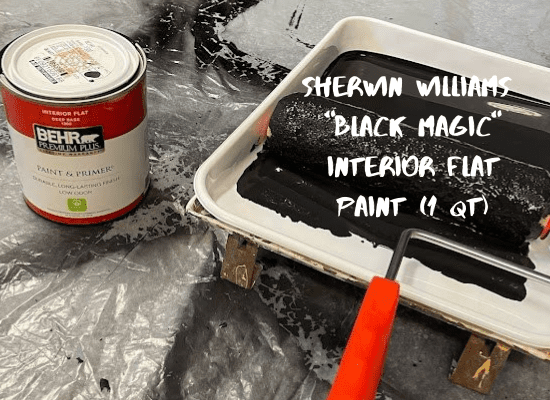

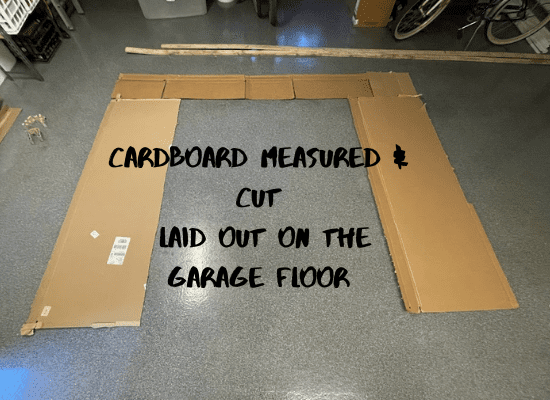

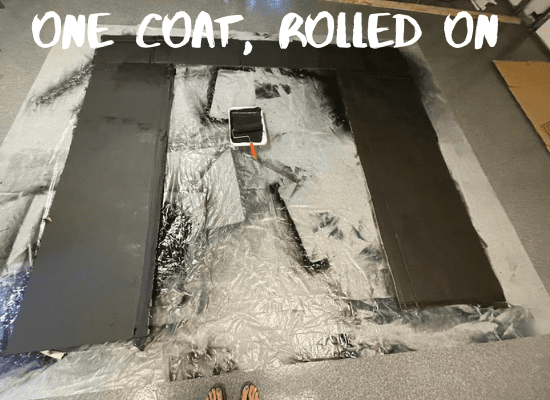

Fitting it into the front entrance location took 2 of us to carry it from the garage to the front door. It’s held in place mostly by the existing wall sconces. I used a utility knife to cut the necessary notches to slide the cardboard in place. I used duct tape to adhere it to the wall in other areas. I have stucco siding, so push pins or small nails were not an option for my house, but would work well for other exterior materials.
Word of caution, this is not weatherproof. Normally, here in California, we don’t get rain until November. For some reason this year the storms hit early. A great joy for this fire-stricken state, but not a friend to outdoor cardboard cutouts. I had hoped to reuse this next year (it folds in half for storage) but I’ll be happy if it makes it to the 31st. After 5 days straight of a whole lot of wet weather, my mausoleum is starting to warp, even with it being out of direct rainfall. If I had anticipated the rain when this project started, I would have used long wood strips (wood trim pieces) along the entire backside perimeter (framed) to help hold it up. But it’s in, and it’s damp, and the duct tape isn’t enough, and it’s too late. So my fingers are crossed that it’ll hold until Halloween! So if you’re in an area where the cardboard could be affected by damp days and moisture, definitely use more reinforcement strips along the back, and you should be gold!
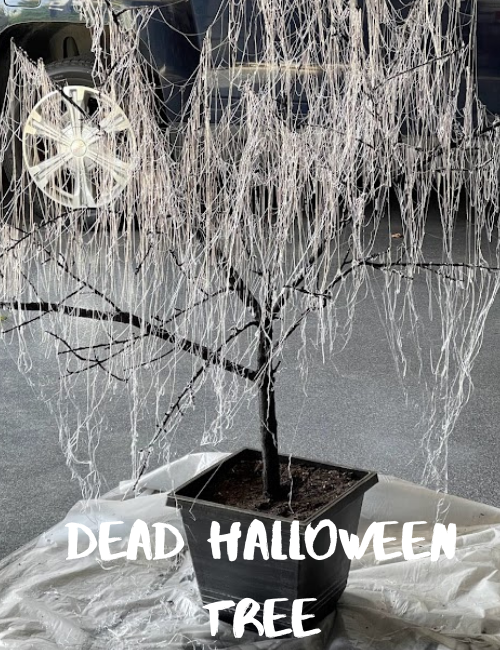
Take any size tree branch and turn it into a plant that could adorn the Munster’s front entrance. With some black spray paint, an old planter, and a glue gun, you’ve got yourself a one-of-a-kind Halloween prop.
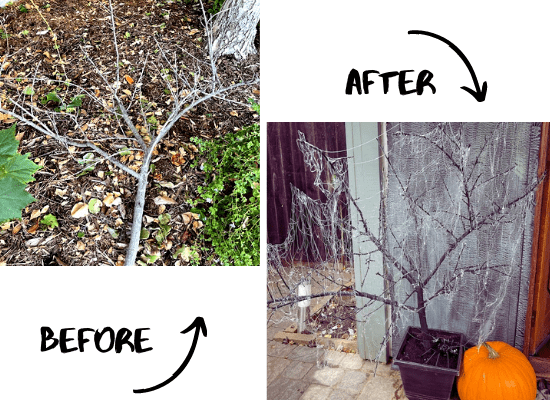
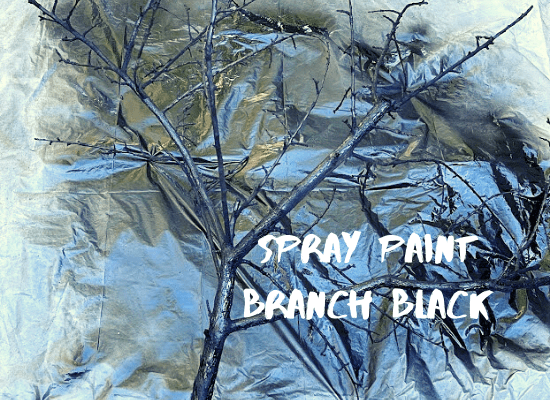

To weigh down the planter and to help steady the tree branch, I used recycled water bottles filled with tap water. This also fills space inside the container, so you use less potting soil.
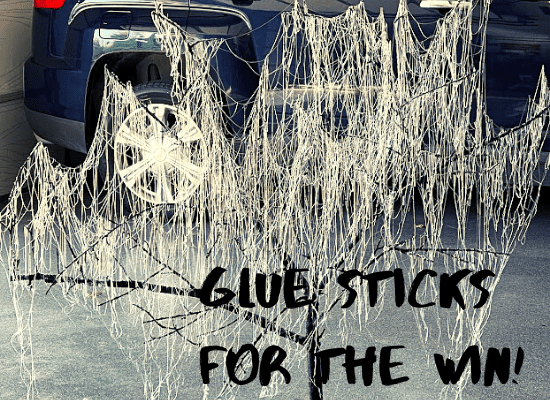
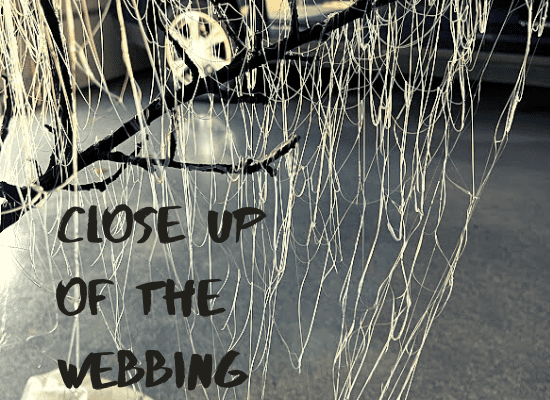
Cover the pot and dirt with a protective covering (I used a kitchen garbage bag). Place it on a tarp, or another garbage bag to catch the glue that falls to the ground.
For this project, I used four 8″ glue sticks. Since your tree branch can be any size (from a small potted indoor plant to a tall tree) the number of glue sticks will vary. The trick to the long strings of webbing is to start from high above the branch. I stood on a step stool and started the glueing process about 2 feet above the tree. Start “gluing” in a side to side pattern over the top of the branch’s stems. The glue cools on its way down and will produce long strands that drip from the branches. Don’t touch them until they’re completely hardened. Cut any strands stuck to your garbage bag or tarp, and you’ve got yourself a realistic-looking dead potted tree covered in spooky cobwebs. Easy Peasy!
This prop can be used indoors or out. If you’re planning on it being outside, make sure that your pot has drain holes in the bottom in case of rain. If you have a dry place to store your creepy dead tree, it’ll last season after season.
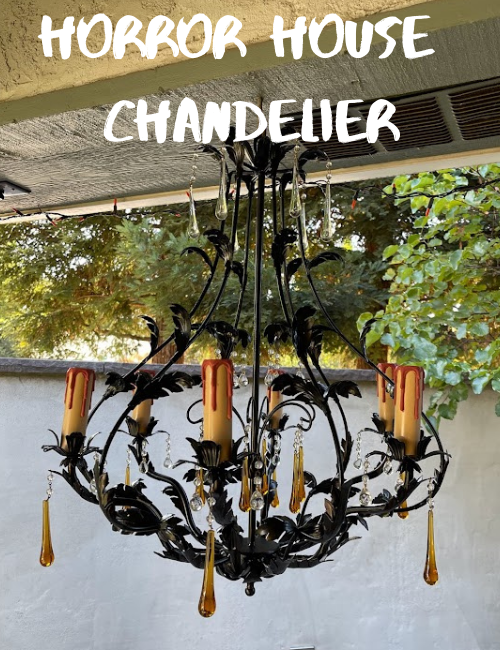
This project started as a “dumpster dive” when I was working for an electrical company. It had been removed from a client’s home and it was so hideous, it wasn’t even donated, it just went straight into the trash. Check out second-hand stores or garage sales and if you happen to find a ghastly chandelier from times gone by, snag it!
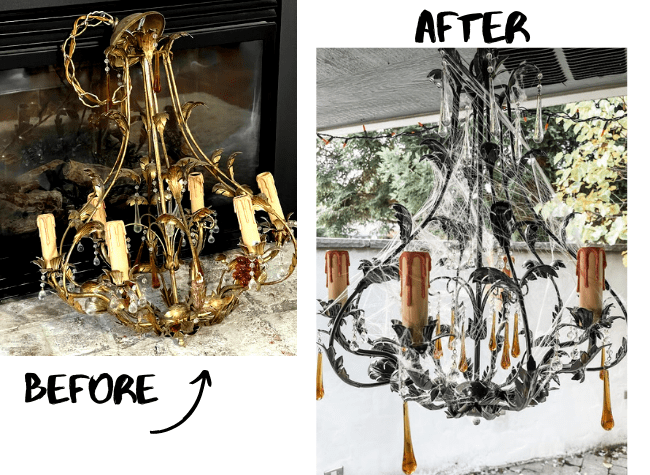
I’ve been hauling this potential project around with me for 7 years, knowing I’d eventually get around to it and have the perfect place to hang it. 4 moves later and we’re in our forever home, so it was time to bring it down from the attic.
I removed the plastic crystals and candle sleeves to spray paint the light fixture black. It was wired to be installed and I’m sure it would have still worked, But since I knew I was never going to hardwire it anywhere, I removed the wire and a portion of the hanging chain with a pair of tinsnips.
I hand-painted the red drippy blood on the candle sleeves. This took a steady hand and quite a bit of time. But the final effect was so worth it!
The plastic crystals had to be reattached using needle-nosed pliers. Several of the crystals had been damaged or were missing, so I created a new pattern that used the ones I had left.
Lastly, I covered the chandelier with some inexpensive stretchy Halloween cobwebs. If you have more skills than I, you could rig battery-powered lights at the top of the candles, where the original light bulbs would have gone. However, with so many projects this month, I chose to table that for next year. If you have a creative suggestion for illuminating the chandelier, please leave a comment below!
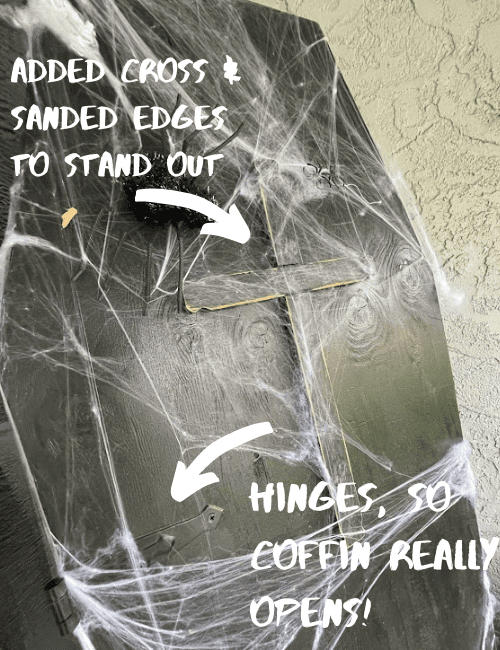

Be afraid, be very afraid
There are endless ideas for Halloween Entrances to die for all over the internet. Once you decide on the theme of your design, it’s easy to find or make the items you need. Spooky, haunting, fun, or gruesome. Enjoy decorating and you’ll bring a lot of joy to those candy craving small goblins that come ringing your bell on October 31st!


Related posts
Related
3 Simple New Year’s Resolutions That Will Make You Happier
How to keep and maintain your New Year’s Resolution. It may be as simple as making the RIGHT resolution that brings joy and happiness into your life. Stop thinking about what you shouldn’t do, and change your resolution to what you can add into your life to gain more happiness.
Thanksgiving Kitchen Essentials
Everything you’ll need in the kitchen to cook a full Thanksgiving meal. From budget basics to luxury living, honest reviews and recommendations.
Dollar Store Halloween Wreath Designs
Sometimes you just need a little inspiration from other crafters. Here are my top design ideas for budget friendly DIY Halloween wreaths
This post may contain affiliate links. Danelia Design is a participant in the Amazon Services LLC Associates Program, an affiliate advertising program designed to provide a means for sites to earn advertising fees by advertising and linking to amazon.com. For more information, please read my disclaimer here.




0 Comments