How to make
Pool Noodle
Lollipops

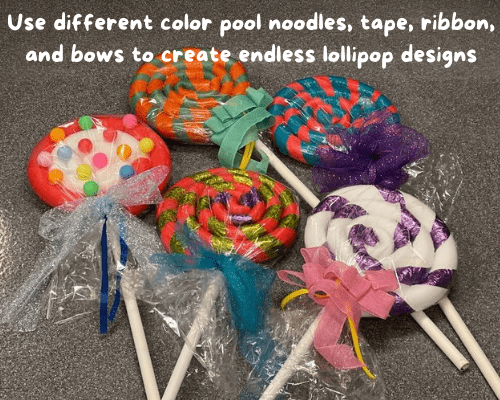
I fell in love with these adorable pool noodle lollipops the first time I saw them on Pinterest. They’re cute, they’re inexpensive, and they’re fairly easy to make. Of course, you need a cute display to show them off, as I did with my Christmas Gingerbread yard. And if you have kids, a Candyland or Willy Wonka-themed party would be incomplete without giant candy! So here you go….my version of the all-popular pool noodle lollipop.
What you’ll need

")
")
")
- Various colors of pool noodles (2 for each lollipop, 3 if you want them larger)
- Colored duct tape
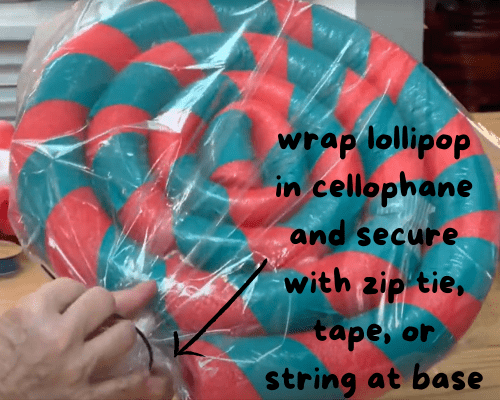
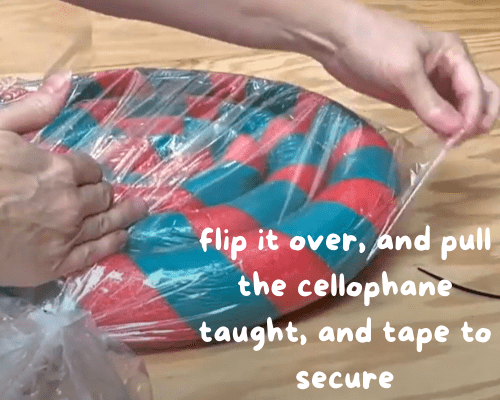
- Cellophane wrap or cellophane gift bags
- 3/4″ PVC pipe for the lolli sticks
- PVC cutter (ratchet pipe cutter)
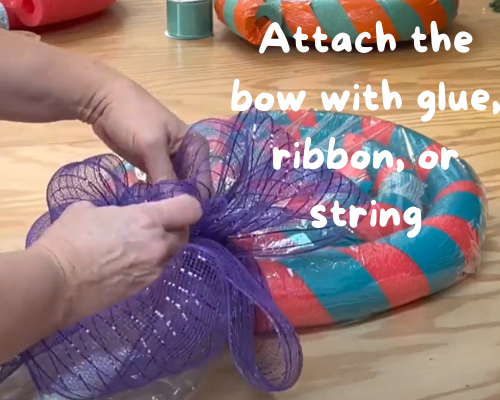
- Various colors of ribbon or large premade bows
- Glue gun, glue sticks (an 8″ stick will finish one lollipop)
- White spray paint
- Measuring tape
Let’s get Started!
Making the Lolli
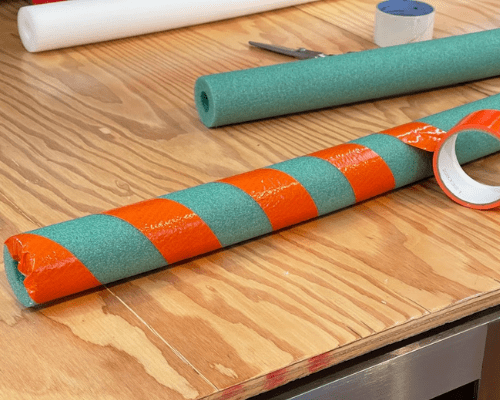
Tape the noodles at an angle
The Dollar Store sells colored duct tape. One roll will more than cover 2 noodles. Note that the “reflective design” duct tape barely covered two, so you’ll want to create a larger gap between each stripe. (start at more of an angle for that to happen) Stripe both pool noodles.

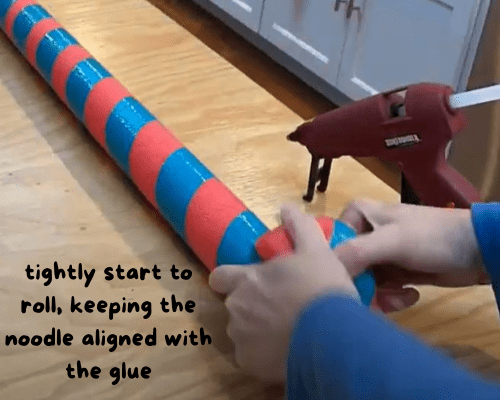
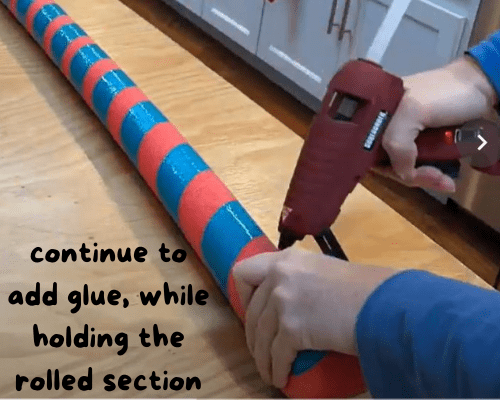
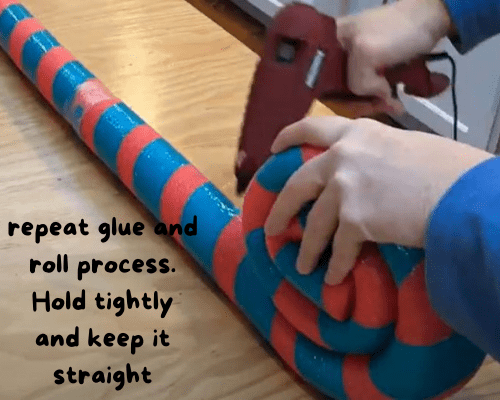
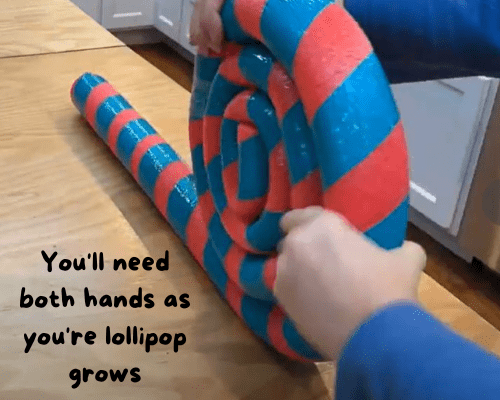
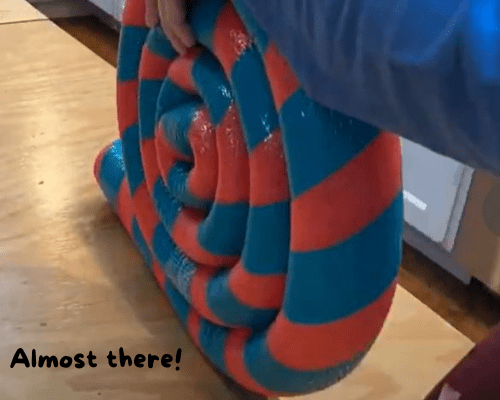
Connect two Noodles
Connect the ends together with your glue gun and clear packing tape. Matching up the stripe at the end will ensure a continuous look. The other option is to connect them first, and then add the striping of duct tape. I found it easier to work with shorter noodles, but either option works.

Glue the ends
The Dollar store duct tape isn’t as adhesive as the real name brand tape (you can buy that here). This allows for more mistakes however, undoing tape, and redoing it – but…because it doesn’t stick as well, I chose to glue the tape down at the ends of the noodles.
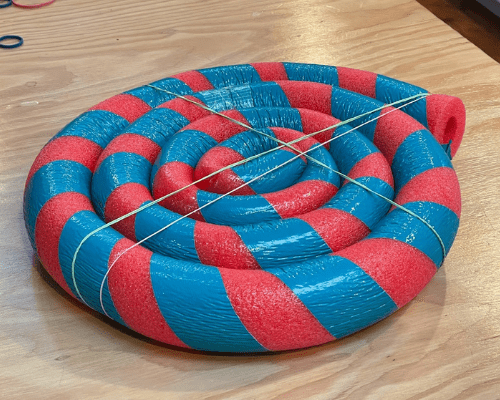
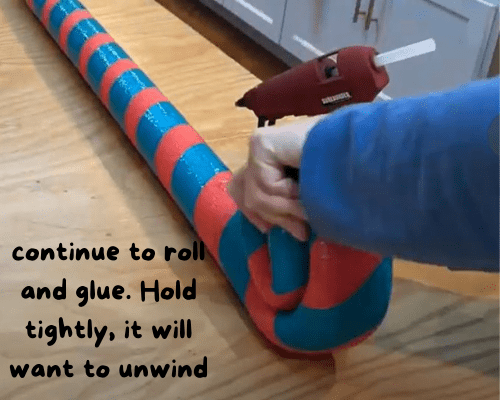
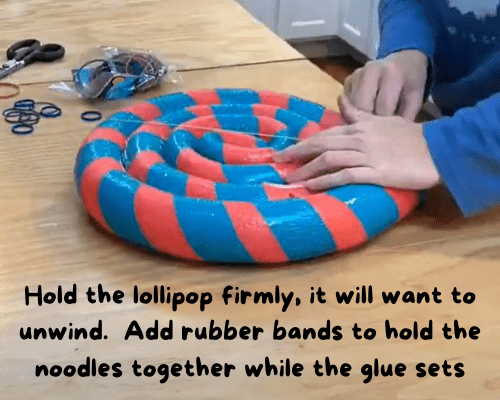
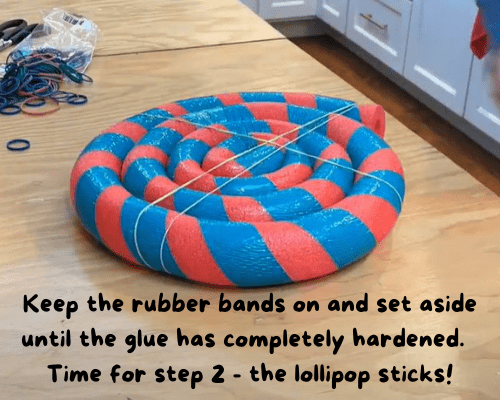
Rubberbands
Use large rubber bands to hold the rolled noodle in place until the glue has set and hardened. The last bit of roll wants to unwind, so ensure that you band that section. Don’t worry about the indentation from the rubber bands. The area expands back to normal after the bands are removed.
")

Step 1
Step 2
Step 3
Step 4
Step 5
Step 6
Step 7
Step 8
Step 9
Step 10
Step 11
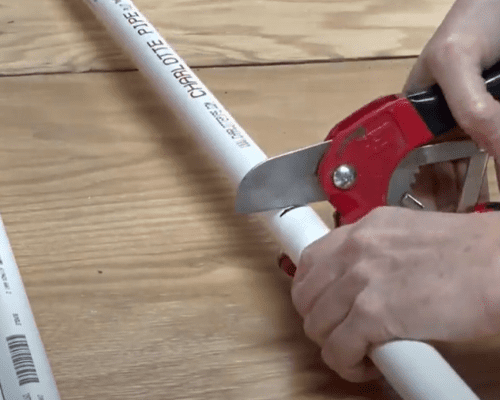
PVC Cutter
An inexpensive ratchet pipe cutter will make for quick work. (buy one here) You could also use a handsaw, but it will be messy and take much longer. Note: do not try and cut very cold PVC, bring it indoors in winter to get to room temperature. Very cold PVC can be brittle and may crack when you cut it.

Spraypaint
You’ll want to paint over the bar codes and red lettering for a perfectly white lollipop stick. Paint in a well-ventilated area, protect your area with a tarp or paper and make sure the temperature is at least 50 degrees. It took 3 coats to fully cover all the lettering. A paint and primer all-in-one spraypaint will save you from the extra coats. Pure acetone will also remove the writing. Use an old rag and wear gloves.
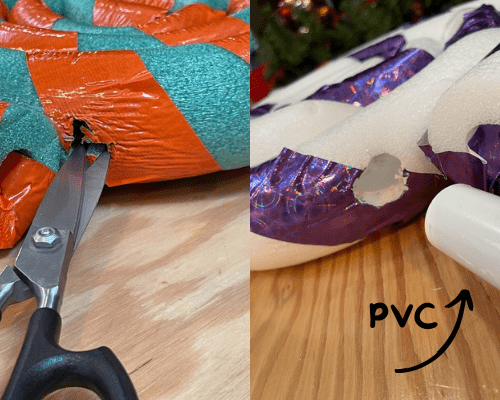
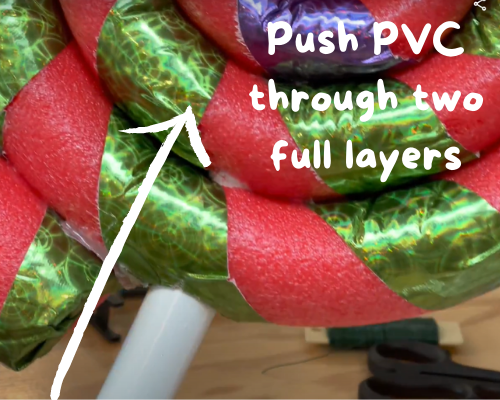
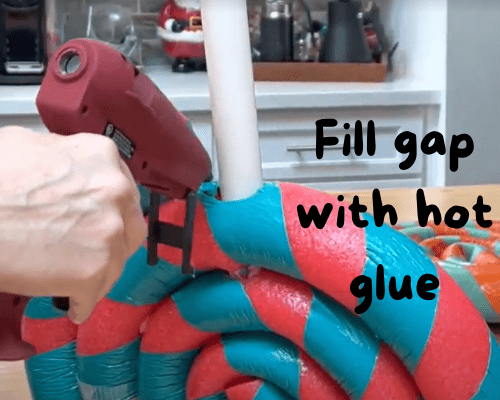
Make room for the stick
Cut a round hole just smaller than the circumference of the PVC for a tight fit. You’ll want to cut 2 rows deep, to securely hold the pipe. Scissors made a quick cut, but you could also use a heat knife to melt through the styrofoam.
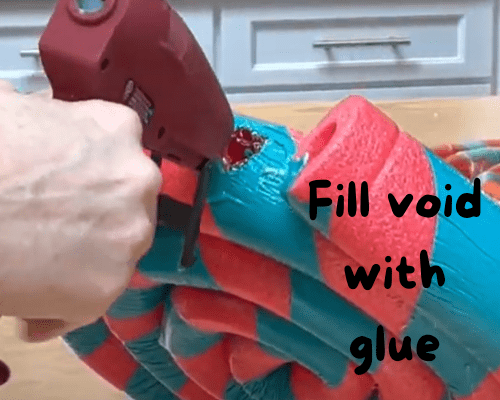
More Glue
Drip hot glue into the void you just made. A squeeze or two will be plenty.
")
")
This DIY project brought back childlike joy for me. The idea of giant-sized candy felt like stepping into Willy Wonka’s Chocolate Factory or playing a real-life game of Candyland. I made these lollipops to add to my outdoor Christmas Gingerbread display, but I’d love to find a fun reason to bring them out again before next year.
An Alice in Wonderland Tea Party, perhaps?
I’ll keep you posted!
Wait! Do you want more?
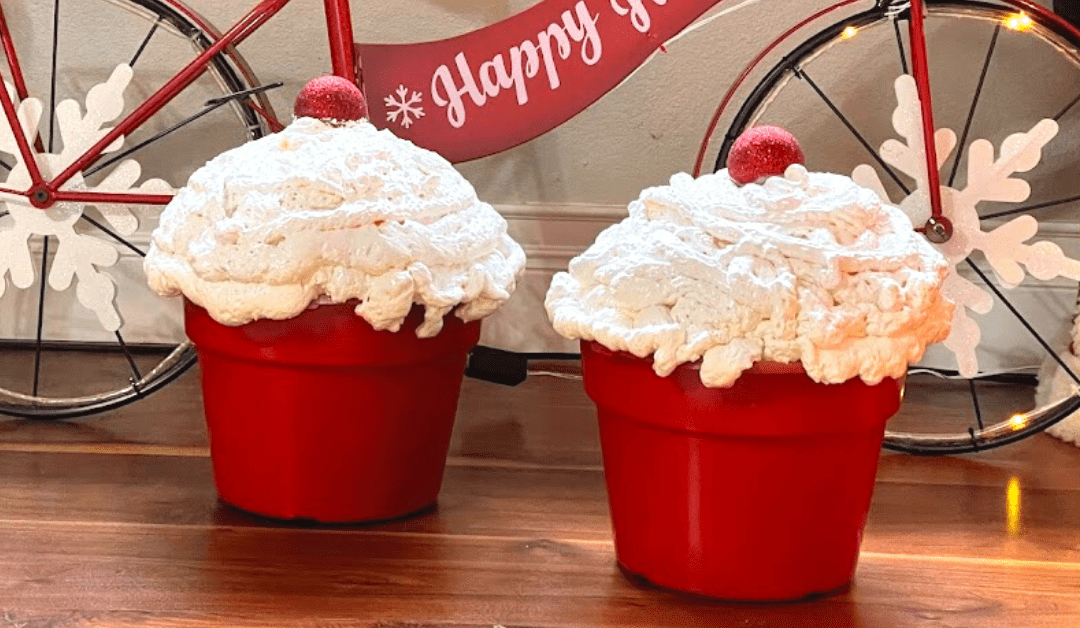
Giant DIY Outdoor Cupcake Decoration
Adorably cute and fun to make! Use this outdoor waterproof decoration at your next baby shower, candy themed party, or for a wedding dessert bar. Kids of all ages will love these giant cupcakes!
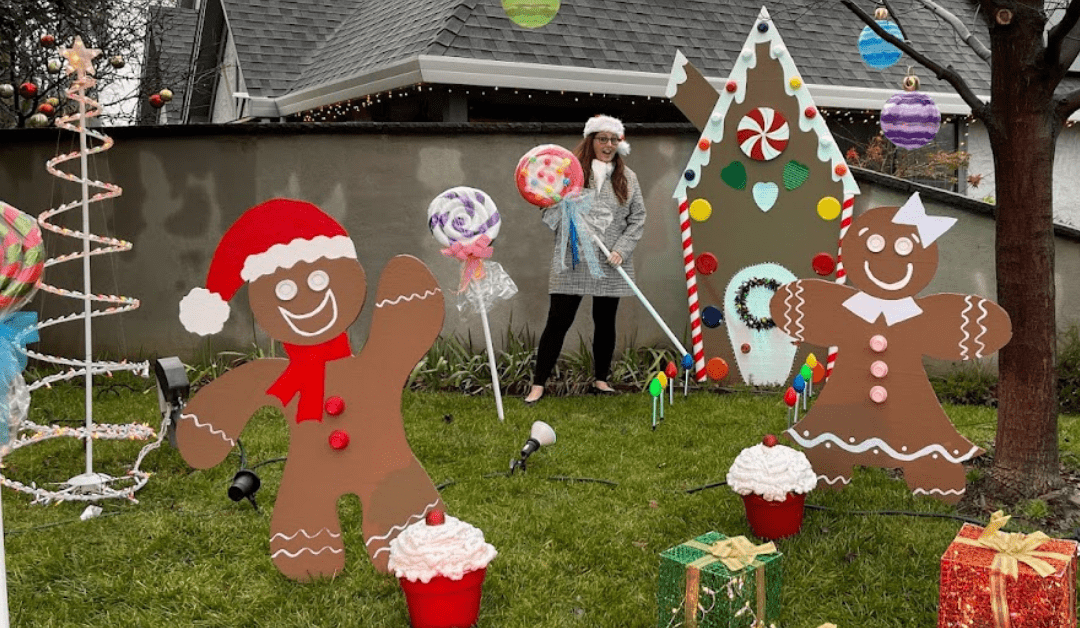
DIY Giant Outdoor Gingerbread Display
Perfect for Christmas or a Candyland themed party! Using Insulated foam board, you can create any shape and prop that your imagination can drum up. No power tools needed!
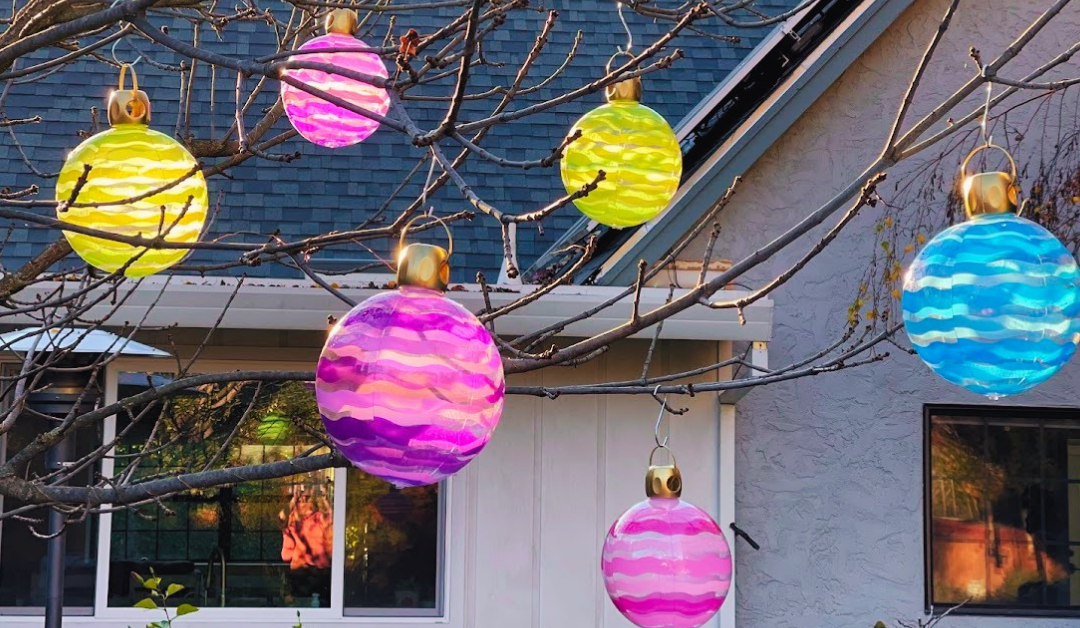
DIY Inflatable Outdoor Christmas Ornaments
Learn to make these simple and inexpensive oversized DIY Christmas ornaments for your holiday yard display. Fun and festive for the holiday season!
This post may contain affiliate links. Danelia Design is a participant in the Amazon Services LLC Associates Program, an affiliate advertising program designed to provide a means for sites to earn advertising fees by advertising and linking to amazon.com. For more information, please read my disclaimer here.


0 Comments