Zucchini
Whether you grow it in your own garden, your neighbor gave you some, or you buy it fresh from the Farmers Market, zucchini is one abundant plant and there’s always more than enough to go around

Growing your own food is easier than you think. And you don’t need a huge plot of land to do it. Raised garden bed kits make things simple, or you can literally grow vegetables inside a bag of dirt! Click here for Roots & Refuge Farm’s How-To video. (she’s my favorite YouTube gardener!) Once you’ve figured out your space, add some sun, water, and good soil you’ll be on your way to a much healthier (and tastier) way of eating!
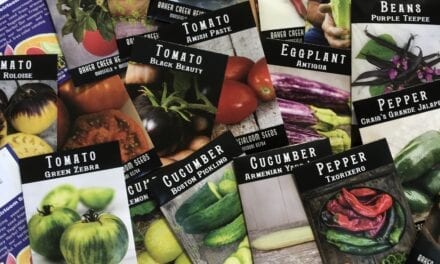
You’ll need to plan ahead when starting a garden from seed. Staring seeds indoors, while it’s still too cold outside will give you a jump start. But even if you arrive late to the summer gardening party, you can find vegetable plants in your home garden centers or nurseries. And ordering seeds from a reputable seed bank gives you the opportunity to find rare and heirloom varieties that Home Depot may not carry.
Is zucchini a squash? -


Zucchini is one of the easier garden vegetables to grow. Once your plants are in the ground, there is hardly any maintenance. The most difficult part is remembering to look for squash every day when it’s producing, or you’ll end up with MONSTER SQUASH!
I will tell you, though, even knowing how easy it is, a couple years back we only had 3 zucchinis out of 4 plants. Adjusting your soil, water, and daily sun amount is part of learning your garden, and you don’t always nail it the first time – so keep at it and adjust as you go. It was the first year in our new house and even though the previous owners used that area as a garden bed, the soil had not been amended and the sprinkler system was a full pop-up spray, as opposed to a drip system.
This year, we added chicken manure to the soil and switched to a drip system. You want to water the roots, not the leaves. When the leaves are wet, they are susceptible to powdery mildew, which will reduce your harvest. When your plants are established, give them a deep water twice a week., with the water penetrating about 4″-6″ down into the dirt.
We initially installed a 2 gallon an hour drip emitter and watered them daily for 10 minutes. When the weather started hitting the 90’s, this was no longer enough water. So we switched out the drip emitters to 10 gallons an hour full circle micro-bubblers to release more water, in a wider circle, to make sure we were getting the roots. With various types of vegetables on the same watering system and timer, you’ll need to adjust the drip heads to get the right amount of water to each plant.
Pay attention to your garden, your vegetables will let you know when they’re thirsty. They’ll droop and the leaves will start to dry out. Zucchini plants do not store water in their leaves, so if they’re wilted and dry – water, water, water! Plants in pots will need more frequent watering than an in-ground garden. Lastly, water early in the morning, and do it on a consistent schedule.
")
")
If you grew your zucchini from seed, once the seedlings are big enough to plant, transition them outside and in the garden. When moving seedlings outdoors, give them a few days to acclimate to the swing between day and nighttime temperatures. Bring them out each day for a week, increasing the time by one hour each day. This is called “hardening off”. And be sure to keep them consistently watered each day. Don’t skip this step, as it ensures a successful transition from the indoor protection they’ve grown accustomed to, to being able to survive the winds and harsh sun of the outdoors. And if you’ve purchased plants from a nursery, they’ve already been hardened and your next step is simply to plant them.
To learn more about starting your garden from seeds. click here

Once your babies are ready to be released into the wild, and their new home is ready to go, it’s time to plant! I used biodegradable 4″ pots, made from cow manure. And no, they don’t smell at all! They continue to feed your plants long after you’ve planted them, and make the planting process super easy, as they go right into the ground without disrupting the plant roots. You can get them here.
With a standard plastic pot, gently remove the plant by tipping the pot upside down and shaking a bit, holding the base of the plant stalk between your fingers to prevent it from falling to the ground. If it seems to be stuck, you can cut the side of the pot with a sharp knife.
Loosen up the roots a bit with your fingers and plant them 2 feet apart in an area that receives 6-8 hours of sun a day.
The holes should be twice the size of the root ball.
Once the plants are in the ground, fill in the holes with compost and soil.
Carefully tamp down the soil with your hands and water generously.
")
This is the time to fertilize your newly planted zucchini. Fertilize once again when they start to bloom. There are many organic fertilizers available, and of course, you can always use the trusty old Miracle Grow. Make sure to purchase the one for tomatoes and vegetables and NOT the all-purpose type. You want more vegetables, not just a bigger plant. When choosing a fertilizer, “10-10-10” on the package means it consists of 10% each of nitrogen, phosphorus, and potassium. Miracle Grow for Vegetables contains an “18-18-21” balance of minerals for more veggie production.
I’d also like to note that as wonderful as Miracle Grow is, it’s a man-made product with minerals or synthetic chemicals. This is only an issue if you want to go completely organic. If that’s the case, then stick with compost, chicken manure, sea kelp, worm castings, fish emulsion, or bone meal. Always read and follow the directions on the package for the type of fertilizing schedule and application process.
")
Now that your zucchini plants are in the ground, watered, and fertilized, you can relax and wait for Mother Nature to do her thing. Monitor the water, check to see if they’re thriving and soon you’ll see the bees pollinating those bright yellow flowers. And in 6-8 weeks after planting, you’ll have more zucchini than you’ll know what to do with!
When it comes time to harvest, the smaller squash can be snapped off easily, using a twisting motion. Larger ones will need to be cut at the stem, 1-2 inches from the fruit (YES! Zucchini is classified as a fruit!)
Once your plants start producing, check them every couple of days and harvest them when they are the size you prefer. And if you do find a MONSTER zucchini, shred it and make some zucchini bread!
")
")
")
with so much zucchini (one healthy plant can produce up to 10 lbs in two months’ time!) what can you do now that you’ve sauteed, fried, grilled, and baked? Bon Appetit is my go-to site for Fancy-Pants dinners. The recipes not only taste amazing, they are also beautifully presented. Click here for 41 incredible zucchini recipes. Oh, and the zucchini blossoms are also edible, so fancy your meals away!
One cup of zucchini is packed with nutrients, including Vitamin B6, Potassium, 40% of your recommended amount of Vitamin A, and 24% of your recommended daily Vitamin C!
")
")


For a healthy Farm to Table meal, start in your own backyard. If you’re new to gardening, zucchini is one of the easier plants to grow. And if you’re an avid gardener, look for heirloom varieties like Costata Romanesco, or Zucchino Rampicante to add to your dinner table
Happy Gardening!
This post may contain affiliate links. Danelia Design is a participant in the Amazon Services LLC Associates Program, an affiliate advertising program designed to provide a means for sites to earn advertising fees by advertising and linking to amazon.com. For more information, please read my disclaimer here.


